


Last War Season 2: What’s New in the Polar World Update
Last War Season 2 completely changes the game, transporting commanders to the snow-covered continent of the Polar World. The virus and zombie mutations are replaced by a harsh climate: extreme cold, blizzards, and a base freezing mechanic. Old strategies no longer work, and alliances will have to adapt their tactics from the very first minutes of the launch.
In this guide, we will break down all the key new features of Season 2 in detail. You will learn how to protect your city from freezing, efficiently farm new polar resources, upgrade High-Heat Furnaces, and gain the maximum advantage from the very first days of the arctic campaign.
📌 Table of Contents
Map Reset and Territory Redistribution in Season 2
With the start of Season 2, the server's World Map is completely reset. All alliances lose control over previously captured cities and outposts from Season 1. Commanders, along with their bases, are automatically relocated to the starting zones located at the edges of the snow-covered polar continent.
The alliance that held the Capitol at the end of the previous season retains its ruling status for another 28 days. However, paving paths, capturing checkpoints, and advancing toward the center of the map will have to be done from scratch.
The main strategic objectives in Season 2 are Dig Sites and Rare Earth zones. Controlling them is vital for supplying the alliance with key resources in extreme cold conditions. You can find all the details about the advancement mechanics and checkpoint control in our guide to the new map and territory capture in Season 2.
Virus and Resistance System
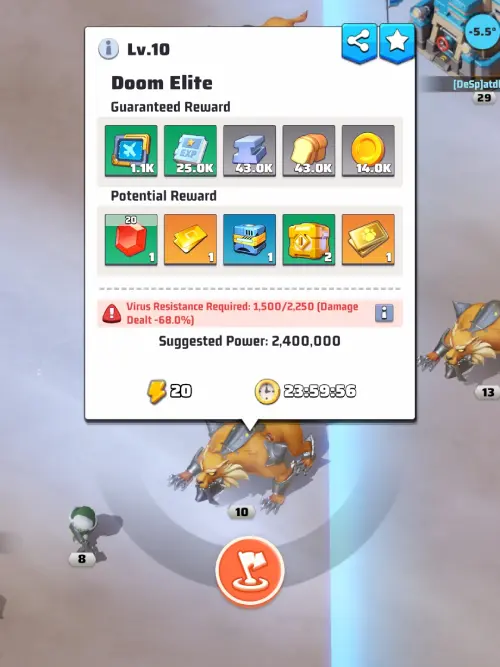
In Season 2, the game world changes: zombies on the map and Doom Elites (which have taken the form of polar monsters) are now protected by a virus. To fight them effectively, you will need a special stat — Virus Resistance  .
.
You can increase your Resistance by building and upgrading the seasonal building — the High-Heat Furnace, as well as by purchasing Battle Passes.
Why is Resistance More Important Than Power?
During the season, your standard power stat takes a back seat. You might significantly outpower the monster, but if your Virus Resistance is below the required level, you are highly likely to lose.
If your Resistance stat meets the monster's requirements, the battle proceeds normally. However, if you lack protection, severe penalties are applied, which grow exponentially depending on the gap between your stat and the requirement:
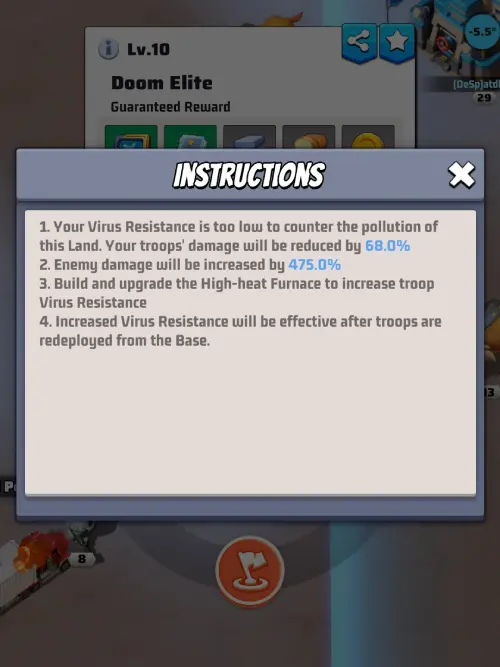
- Your damage reduction: If you lack resistance (for example, when your stat is 1500 but 2250 is required), your damage drops by 68%. As you move on to stronger monsters, the penalty will only increase, reaching up to 99% at a critical gap.
- Monster damage increase: The enemy starts hitting much harder. At the same ratio (1500 to 2250), the monster's damage to your troops will be increased by 475%. At the maximum penalty, this stat reaches up to 900%.
Thus, the more protection you lack, the weaker your troops hit and the more devastating the enemy's attacks become.
Rallies — Team Play
The rally mechanics in the season follow special immunity distribution rules, which remain the same as in Season 1:
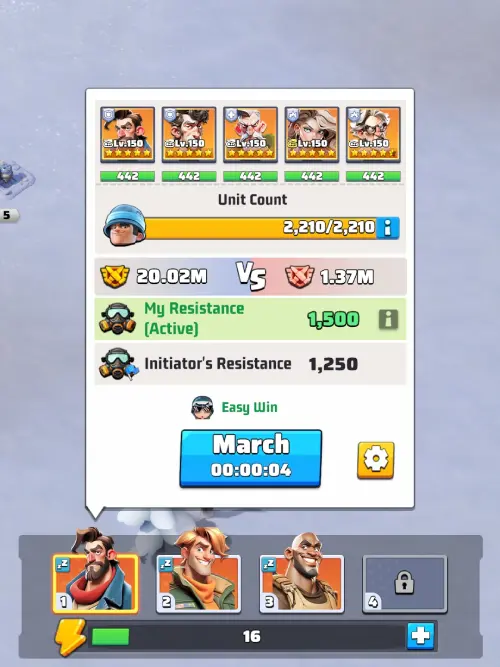
- Leader Priority: The rally leader's resistance stat is applied to all team members.
- If your resistance is lower than the leader's: You automatically use the leader's stat and fight without penalties.
- If your resistance is higher than the leader's: You keep your own (higher) stat, but it only protects your troops and does not help other participants.
Using these rules, you should carefully plan your personal attacks and group attacks on alliance targets.
Personal Attacks on Doom Elites
For the first victory at each Doom Elite level, you receive valuable rewards. In Season 1, these were Mutant Crystals; in Season 2, it's Coal  , which is essential for seasonal upgrades. Once you kill a level 1 monster and claim the Coal, you won't get the resource for killing the same level again. You need to move on to level 2.
However, the Resistance requirements increase with each level. As you upgrade your base, you will constantly hit the ceiling of your current progression: as soon as your resistance falls short, the monster gains massive buffs, and you lose. After getting Coal and upgrading your furnace, you will clear another 2-3 monster levels before hitting a new ceiling.
In practice, at the start of the season, almost the entire alliance eventually hits the "ceiling" of the strongest player, as the majority lags behind in upgrades and survives solely thanks to their help.
How to get Coal if you lack resistance:
- YOU initiate the rally: For the game to count the "first kill" for you, you must be the rally leader. A strong ally joins you as the second player.
- Minimizing losses: Send only one hero with the lowest level in your squad (instead of a full squad of five). They will take a minimum number of troops, reducing your permanent troop losses to an absolute minimum.
- How it works: In battle, your weak squad is quickly defeated with minimal losses. Then the second player (your strong ally) steps in. Thanks to their high Virus Resistance, they take no losses at all, finish off the monster, and you get your Coal to upgrade your furnace.
Group Attacks on Objectives (Mines)
This season, alliance military bases have been replaced by Mines. The game mechanics here are exactly the same as in personal rallies, but the purpose of your actions changes drastically.
While in personal attacks you are forced to initiate a rally with low resistance for the sake of your own reward, doing so in group battles for alliance objectives is absolutely pointless. The same Leader Priority applies here. If you start a rally with low resistance, not only will you die first, but you will also drag down all the participants — their troops will receive penalties based on your low stat.
Therefore, when attacking Mines, only the player with the highest resistance should initiate the rally. By joining their rally, you automatically gain their high protection stats, avoid penalties, and bring real value to the alliance in battle. If the leader's protection is insufficient, the entire team's damage will be reduced to zero, and troop losses will be catastrophic.
New Polar Resources: Coal and Titanium Alloy
With the onset of the Polar Storm, Season 1 resources are replaced by new materials critical for your base's survival: Coal and Titanium Alloy.
Coal
Used for:
- Constructing and upgrading seasonal buildings.
- Fueling the High-Heat Furnace (provides heating and protects the base from freezing).
How to obtain:
- First-time kill rewards for specific level zombies.
- Completing seasonal quests.
- First capture rewards for Cities and Dig Sites.
- Controlling Dig Sites — provides continuous passive Coal production.
- Rewards for reaching High-Heat Furnace level milestones.
- Using tickets in the "Hero's Return" tavern section (Legend Returns event).
- Weekly and Seasonal Battle Pass (provides the biggest resource boost).
- Supply Collection event rewards.
- Participating in the Polar Dishes event — reward for feeding the dog named Snowflake.
Titanium Alloy 
Used for:
- Constructing and upgrading all seasonal buildings.
How to obtain:
- First-time kill rewards for specific level zombies.
- First daily kill of a Doom Walker.
- Completing seasonal quests.
- First capture rewards for Cities and Dig Sites.
- Rewards for reaching High-Heat Furnace level milestones.
- Using tickets in the "Hero's Return" tavern section.
Season Buildings in Season 2
In Season 2, new types of structures are introduced, essential for surviving the Polar Storm. Just like in the previous season, personal season buildings are placed outside the main base (in the same outer territory). Some of them are available immediately, while others unlock as you progress.
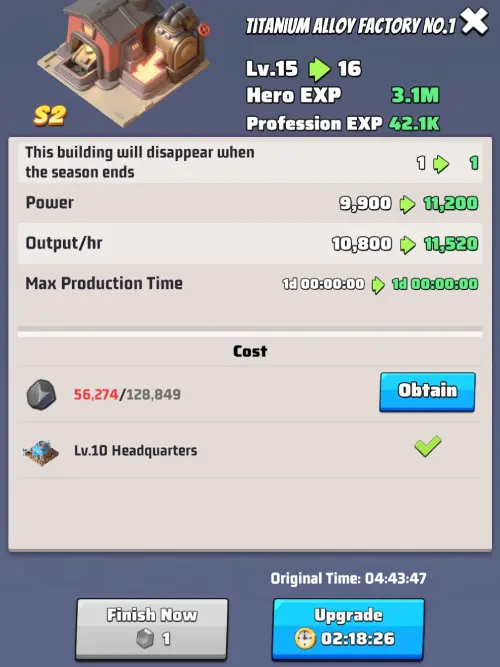
Titanium Alloy Factory
This building replaces the Protein Farms from Season 1. The factory produces Titanium Alloy , which is crucial for upgrading your main furnace.
- Requirements: Constructing and upgrading the factory requires Coal .
- Limits: The building can be upgraded to level 30, regardless of your Headquarters level.
- How to unlock more: Once your first factory reaches level 15, you unlock the ability to build a second one. The third one unlocks when the second reaches level 15, and so on. Players with an active Weekly Pass gain immediate access to one additional factory.
💡 Important Tactical Tip: With each new level, the factory's upgrade cost (in Coal) increases significantly. However, the production boost always remains the same — exactly +720 alloy per hour, regardless of whether you are upgrading the building from level 1 to 2 or from 29 to 30. So play smart: first, unlock all available factories (by reaching level 15 on the previous ones), and then upgrade them systematically, always starting with the lowest-level building. This is the cheapest and fastest way to maximize your passive income.
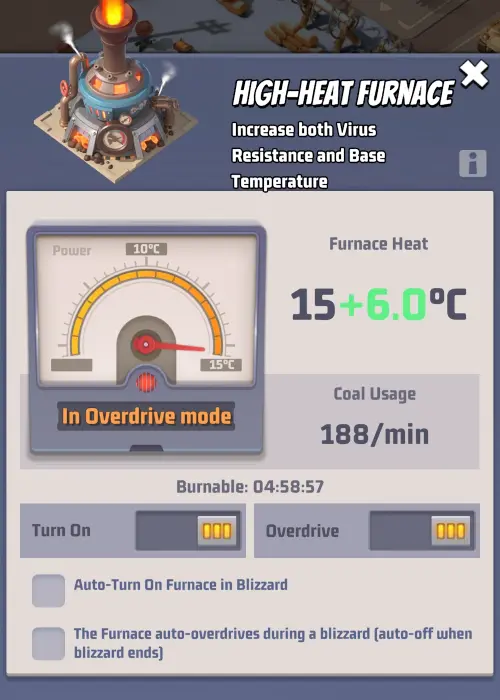
High-Heat Furnace
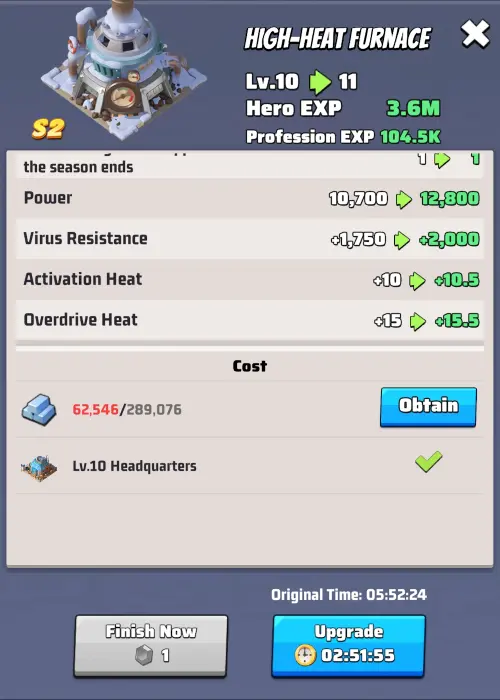
The heart of your base in Season 2 (the equivalent of the Virus Research Institute). This building serves two crucial functions: it heats the city and increases your protection against polar monsters.
- Requirements: Upgrading the furnace requires Titanium Alloy.
- Limits: The building can be upgraded to level 30, regardless of your Headquarters level.
Virus Resistance:
Allows you to attack stronger Doom Elites without penalties. The resistance growth curve completely mirrors the mechanics of Season 1 (maximum — 10,000 points at level 30):
- Levels 1 to 5: +100 resistance per level.
- Levels 6 to 15: +250 resistance per level.
- Levels 16 to 20: +400 resistance per level.
- Levels 21 to 30: +500 resistance per level.
Temperature Control and Coal Consumption:
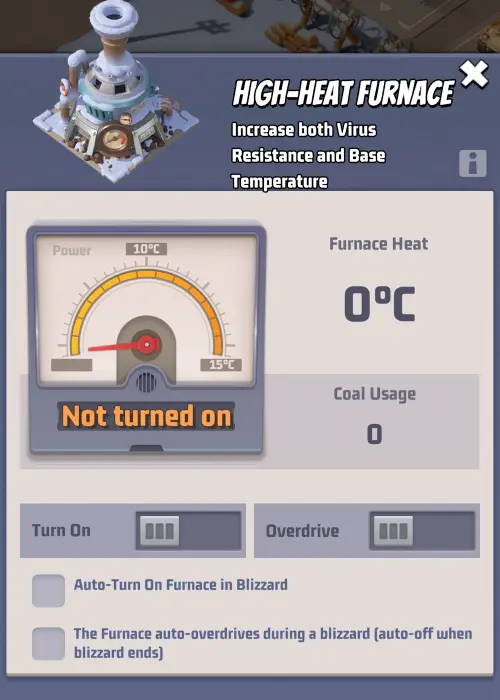
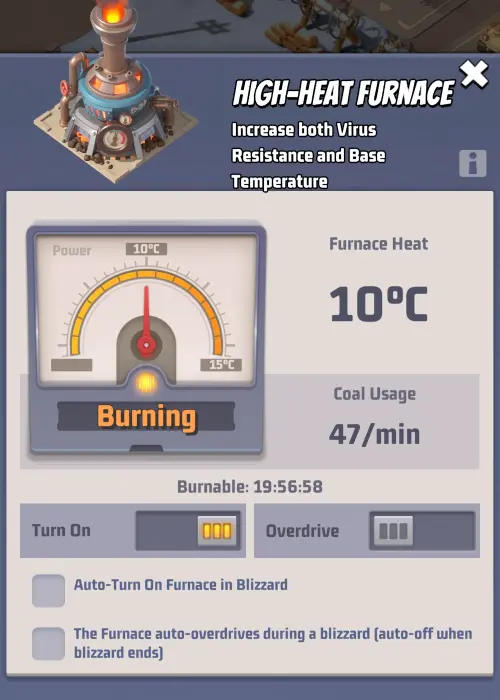
The temperature provided directly depends on the building's upgrade level. The furnace has three manual operating modes:
- Furnace Off: The building provides no heat (0°C) and consumes no Coal.
- Burning: The furnace provides base temperature (e.g., +10°C at level 10) and consumes a standard amount of Coal per minute.
- Overdrive: The furnace provides increased temperature (e.g., +15°C at level 10), but Coal consumption increases by 4 times.
Automatic Control: Two settings (checkboxes) are available in the furnace interface to automatically turn on the furnace and automatically switch to Overdrive when a blizzard approaches. Using this feature is necessary to prevent your base from freezing and to consistently receive rewards in the "Cold Wave Incoming" event. However, use the automation carefully and keep an eye on your supplies so you don't accidentally burn through all your Coal while offline.
Alliance Furnace
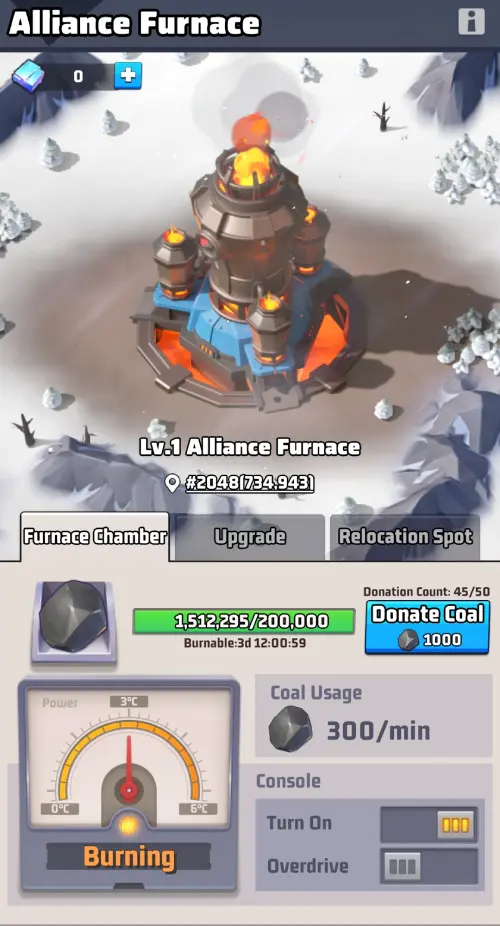
A completely new team mechanic. In addition to personal furnaces, your alliance can build a massive shared furnace on the World Map.
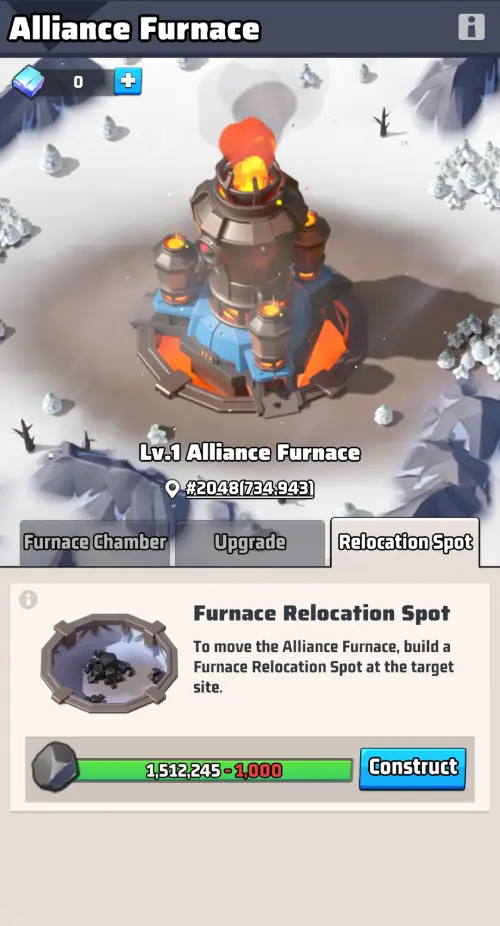
- Construction and Relocation: Starting from day one of the season, the leadership (R4/R5) can place a construction site on a level 1 territory. All alliance members donate their Coal to build it. If necessary, the Furnace can be relocated to a new territory, but it will have to be rebuilt from scratch at the new location.
- How it Works (Furnace Chamber): Regular alliance members consistently donate Coal into the shared Furnace Chamber. The leadership (R4/R5) uses the control panel to decide when to turn on the base heating or activate Overdrive mode (for example, during a blizzard).
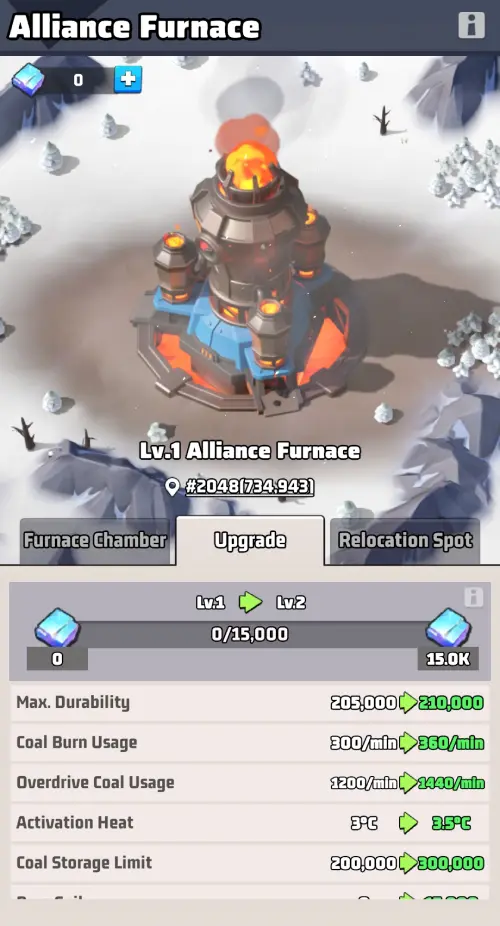
- Upgrading the Furnace: Capturing cities on the polar map allows the alliance to obtain special materials. These are used to upgrade the Alliance Furnace, increasing its maximum durability, base temperature, and Coal storage limits.
- Area of Effect: The Alliance Furnace heats bases within a specific area around it. It is important to understand that the temperature bonus is the same for everyone inside this active zone.
💡 Alliance Tactical Tip: Create a dense "hive" around the Furnace. Since the temperature is the same across the entire heated area, there is no point in placing weaker players closer to the center for warmth. On the contrary — position your strongest and most active players as close to the Alliance Furnace as possible. This will allow them to send troops to defend the building much faster in the event of an enemy attack.
Alliance Resource Mines
Just like in Season 1, after defeating a Doom Elite, there is a 5% chance for a special type of alliance resource tile to appear on the map. This season, they are called Mines.
- Features: Up to 10 squads can gather resources at a single Mine simultaneously.
- Resource Drop Rates in the Mine:
- Titanium Alloy, Coal, or Diamonds — 11.11% chance (for each resource).
- Food, Iron, or Coins — 22.22% chance (for each resource).
Season 2 Military Bases
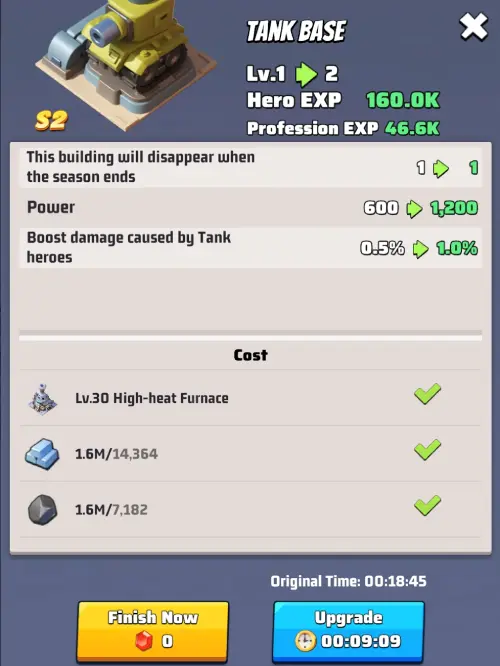
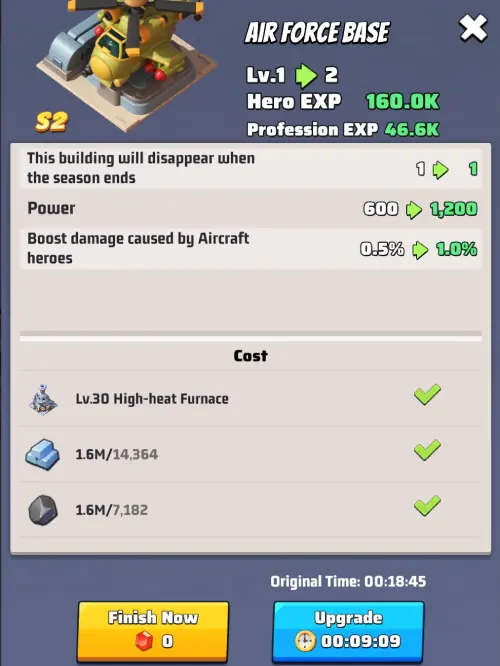
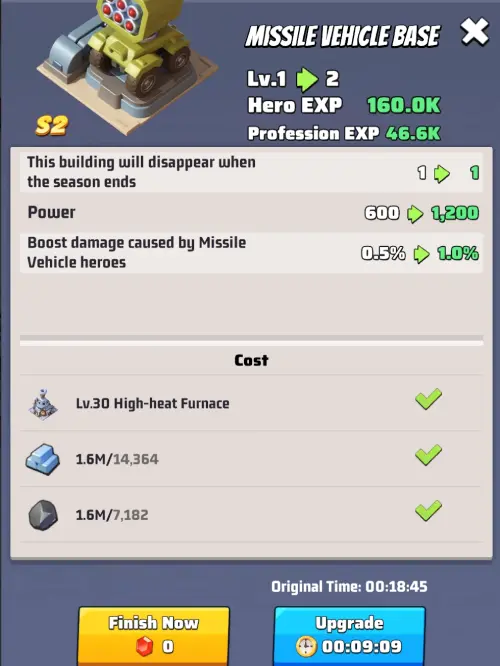
Once your High-Heat Furnace reaches the maximum level 30, three new buildings will become available: Tank Base, Air Force Base, and Missile Vehicle Base.
- Function: Each level upgrade increases the bonus damage for the corresponding troop type.
- Requirements: Upgrading requires Coal and Titanium Alloy. The buildings can be upgraded to level 30, regardless of your Headquarters level.
- Important: Just like in Season 1, all Military Bases will completely disappear after Season 2 ends.
Climate System and Temperature Mechanics
In Season 2, a new, equally dangerous enemy joins the fight against the virus — the harsh polar cold. Weather and the environment now directly affect your troops' stats, and simply building a furnace won't be enough — you need to properly manage the temperature.
Base Temperature and Map Influence
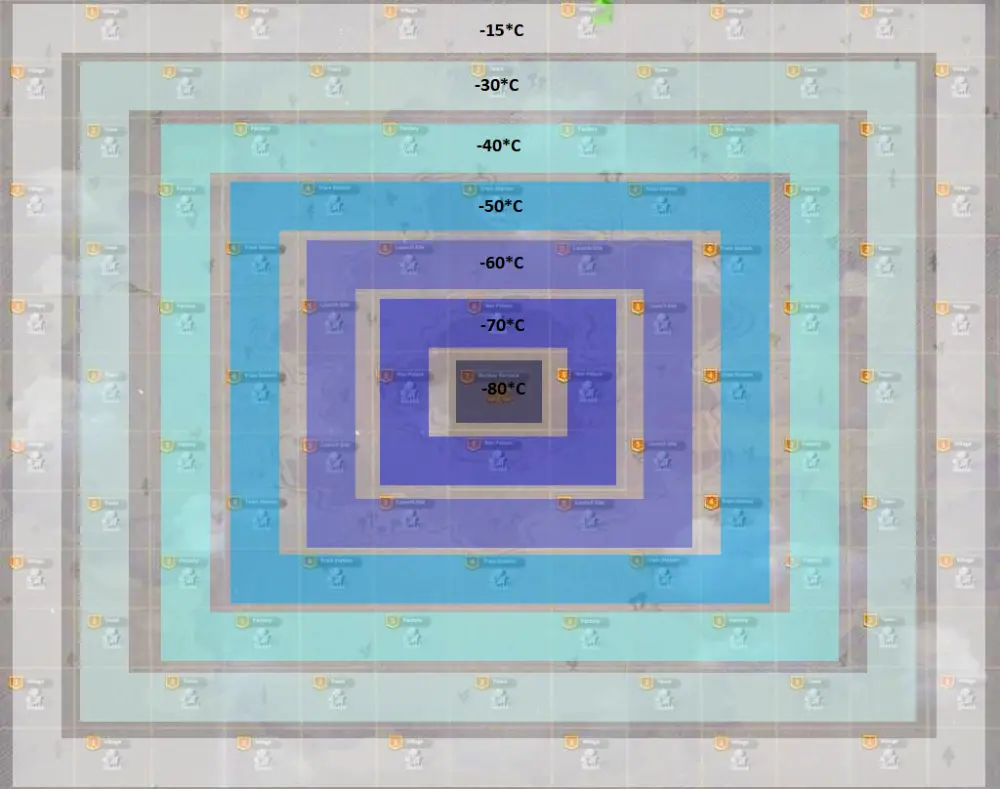
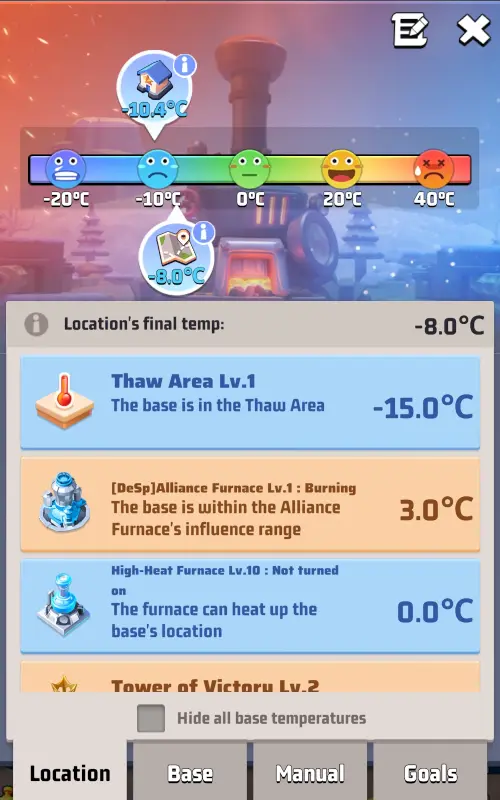
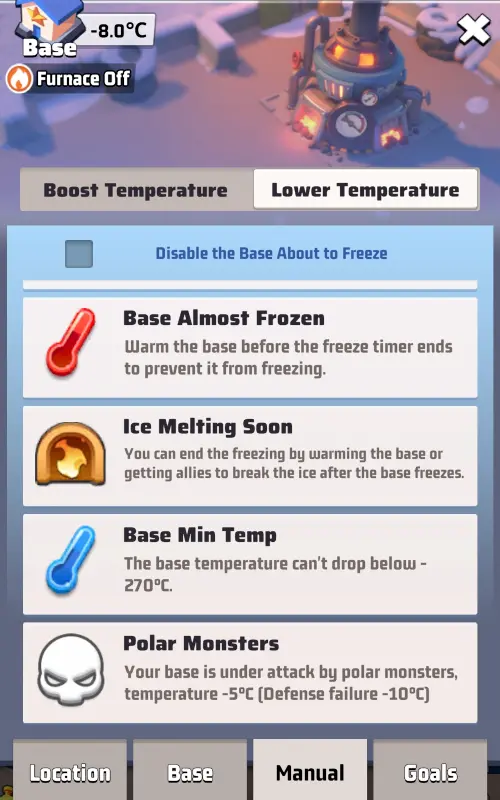
Your base temperature initially depends on the land you are located on. At the edges of the map (in the starting zones), there is a tolerable cold of around -15°C. However, as your alliance advances toward the center of the map (to the Capitol), the base cold will intensify, dropping as low as -80°C.
Weather acts as an additional factor. If a blizzard hits the server, it temporarily lowers the ambient temperature (for example, a level 1 blizzard drops the temperature by another 10°C).
Interface and Temperature Scale
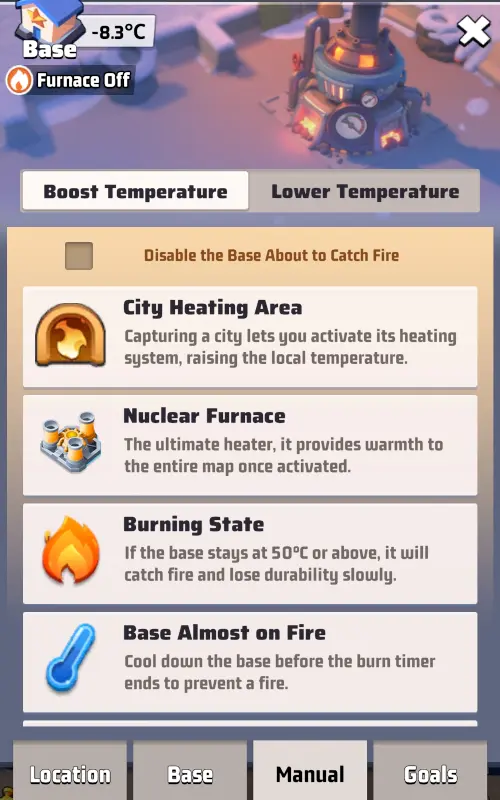
You can monitor your city's status via the icon above the truck dispatch. Tapping it opens a detailed temperature menu:
- Current and Final Temperature: The scale displays your current temperature and a list of all active effects applied to you.
- Gradual Change: It's important to understand that the temperature doesn't change instantly. If you suddenly receive a heat buff, the slider will move fairly quickly, but smoothly, toward the final mark.
Critical Marks: Freezing and Burning
The temperature scale has two dangerous thresholds that you need to avoid (or control):
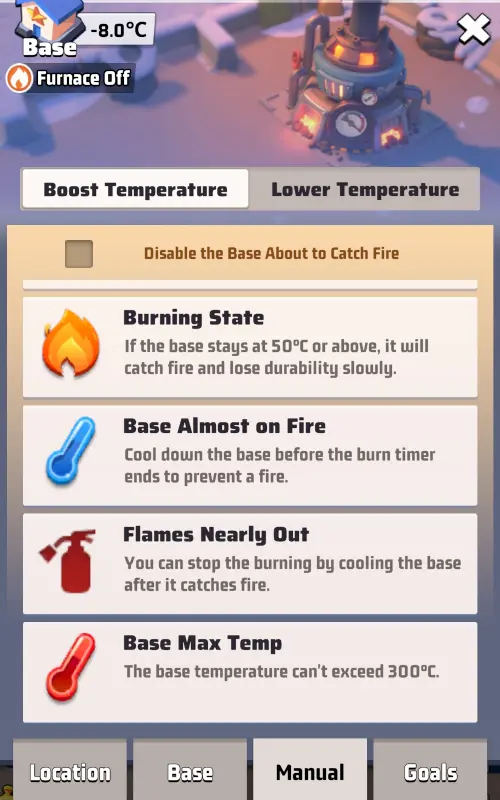
- Freezing (-20°C): If the temperature drops to this mark, a 5-minute timer starts. If you don't raise the temperature within this time (e.g., by turning on the furnace, teleporting to a warm zone, or receiving help), the base will completely freeze. You won't be able to attack or teleport. To escape this state, you need to turn on the heating or ask allies to "break the ice".
- Burning State (+50°C): If you overheat your base (or are under powerful buffs), the base catches fire and gradually starts losing Durability.
Why Do You Need High Temperature? (Combat Buffs)
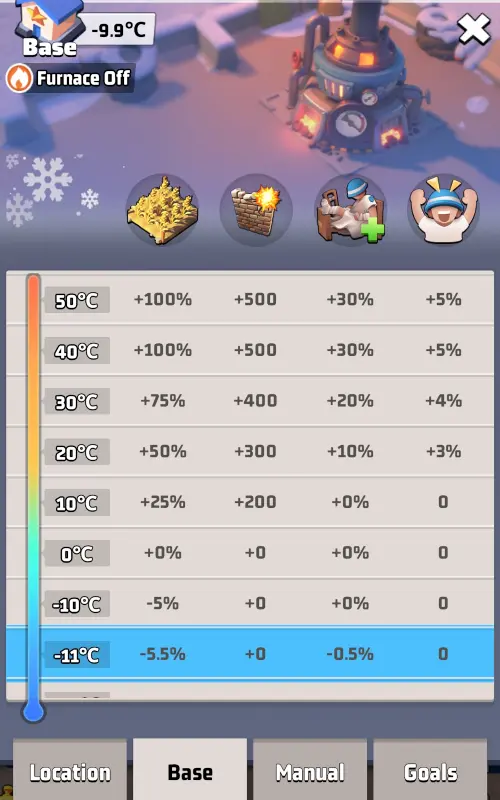
In the "Base" tab, you can see the buffs provided by heat. The gathering speed boost can be ignored (it's insignificant), but the other effects are critical for PvP and active combat:
- Wall Damage: Increases base damage when attacking enemy cities.
- Hospital Healing Speed: Significantly speeds up the recovery of your wounded troops.
- Morale: Noticeably increases your troops' damage in battle.
💡 Alliance Tactical Tip: During large-scale battles for objectives or enemy furnaces, the alliance should work to support its strongest player. Regular members should mass-send help to artificially "boost" their temperature to the maximum. The top player receives massive buffs to Morale and healing speed, after which they can crush the enemy's resistance.
How to Increase Base Temperature?
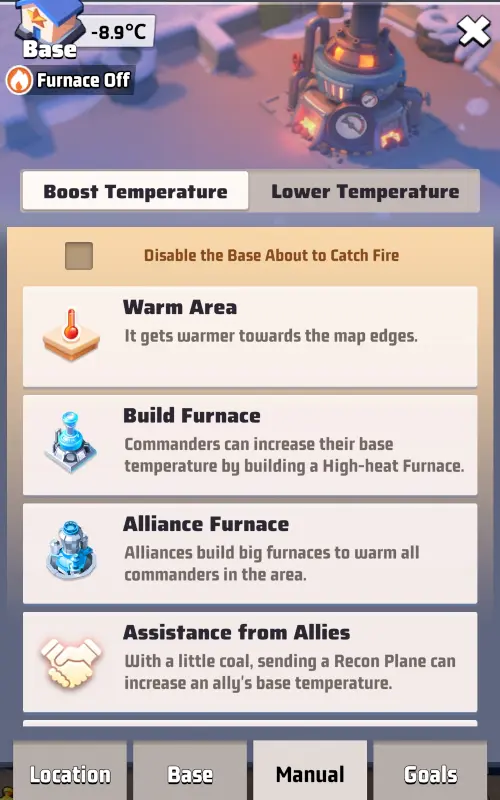
- Relocation: Teleporting to warmer zones on the map (Thaw Area).
- Personal Buildings: Turning on the High-Heat Furnace (standard mode or Overdrive).
- Alliance Furnace: Placing your base within the radius of an active shared furnace.
- Ally Assistance: An alliance member can send a recon plane to you (costs 100 Coal). This provides a temporary temperature boost depending on their Profession level.
- City Heating Area: Capturing NPC cities activates the heating system around them.
- Nuclear Furnace: A global structure in the center of the map. Once built, it can heat the entire server.
How to Lower Base Temperature?
- Natural Environment: The onset of a blizzard or manually turning off furnaces.
- Attacking Monsters: Every attack you make on polar zombies on the map lowers your base temperature by -3°C. If you start clearing monsters too quickly and in large numbers (for example, while completing daily tasks), you will rapidly lose degrees and risk freezing your base.
Season Boosts (Decorations)
Unique seasonal decorations will be of immense help in managing the climate:
- Tower of Victory: Provides a permanent passive increase to your base temperature (e.g., +3°C at level 1, +5°C at level 3).
- Eternal Frost Castle: The ultimate decoration. It grants your base complete immunity to burning (you can push the temperature above 50°C without losing Durability), and also lowers the enemy base's temperature by 3°C after your successful attack.
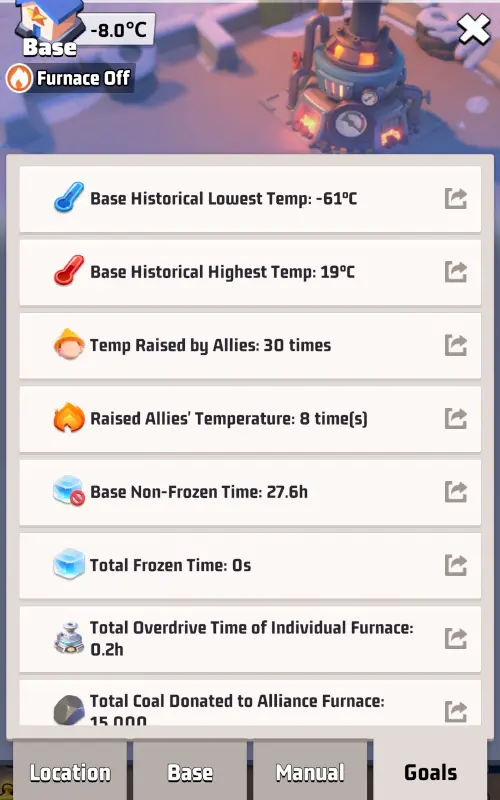
Note: In the "Goals" tab of the temperature menu, you can always check your statistics — historical highest and lowest temperatures, as well as the number of times you assisted allies.
Hero Changes in Season 2
1. Legend Returns
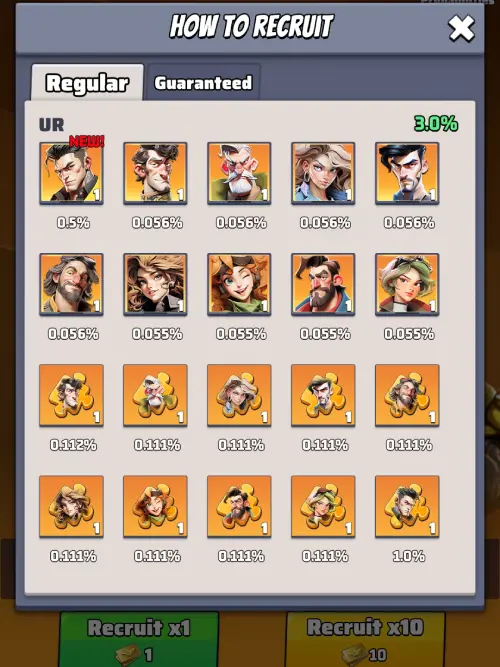
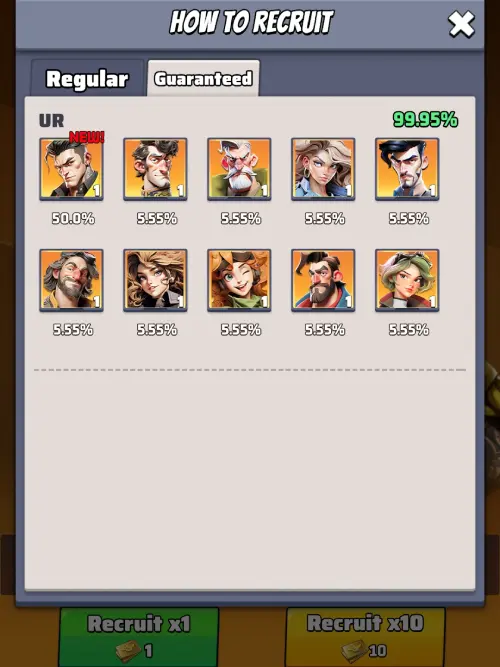
Starting from the first day of the season, a new section will appear in the tavern where you can use special recruitment tickets — "Hero's Return"  . The main hero of this section will be McGregor, and the chance of obtaining him will be significantly boosted. This is an excellent opportunity to upgrade this hero and increase his star level for players who haven't developed him much yet.
- Regular Recruitment: the drop rate for a full McGregor is 0.5%.
- Guaranteed Recruitment: the chance to get exactly McGregor skyrockets to 50%.
💡 Important: These tickets fully participate in the "Arms Race" and "VS Duel" events, granting the same amount of points as regular recruitment tickets.
🔥 Tactical Tip: Don't forget that when a regular recruitment doesn't trigger a hero drop (and items drop instead), the received resources may include Coal and Titanium Alloy. Therefore, if you are just a little short on materials for an important seasonal building upgrade, it might be wise not to hoard your tickets but to use them right then and there.


2. Weapons of Legends
Starting from day 4 of the season, a new special recruitment section opens in the tavern. Here, New Era Recruitment Tickets are used  .
.
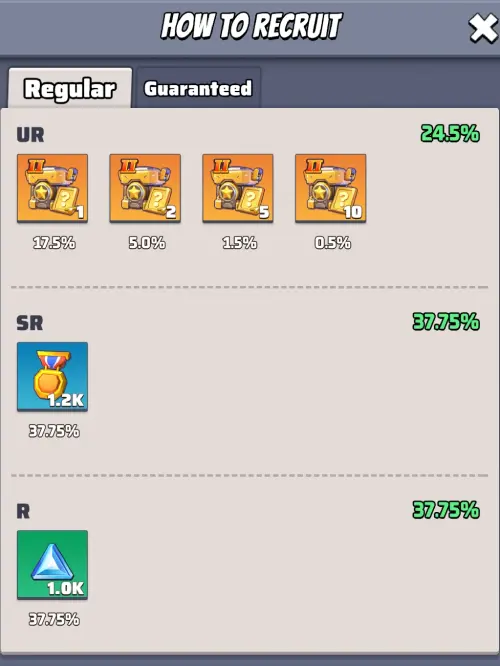
By using these tickets, you can obtain a Hero Exclusive Weapon Shard Choice Chest II. From this chest, you can then manually select shards for the Season 1 hero you need: Kimberly, DVA, or Tesla.
Chest Drop Rates:
- Regular Recruitment (using a ticket): the chance to get a choice chest is 24.5%.
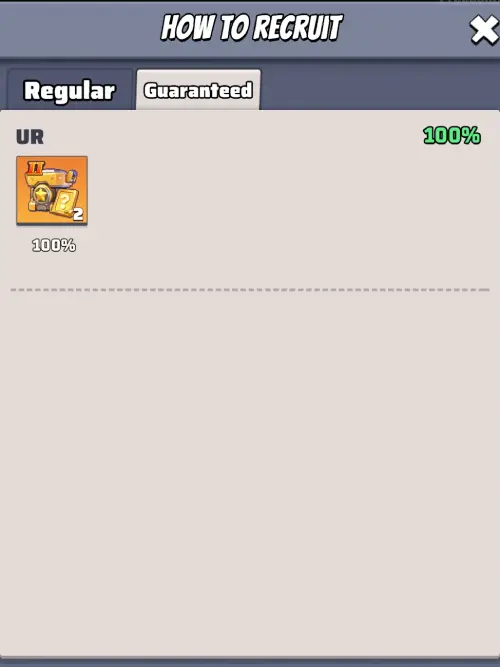
- Guaranteed Recruitment: if the chest doesn't drop during regular attempts, every 20 tickets used provide a 100% guarantee to obtain it.

3. Exclusive Weapon
In the new season, new heroes will receive their Exclusive Weapons. The rules for obtaining and upgrading them remain the same.

Murphy
Starting from day 4 of the season, you can obtain Murphy's Exclusive Weapon Shards through the Battle Pass (premium). They allow you to:
- activate the weapon;
- upgrade it further.
If you are a Free-to-Play (F2P) player, you can hoard Universal Exclusive Weapon Shards, but they can only be used for upgrading, not for activation (you will have to wait for the Black Market to open).

Carlie
Starting from day 18 of the season, Carlie's Exclusive Weapon will become available following the same pattern.
- Activation — only through the Battle Pass.
- Upgrading — using Universal Shards.

Swift
Starting from day 39 of the season, Swift's Exclusive Weapon will become available. The principle of obtaining and upgrading is the same:
- Activation — only through the Battle Pass.
- Upgrading — using Universal Shards.
Full information about the Exclusive Weapons for all heroes is available in our guide.
4. Black Market
Starting from day 57 of the season, the Black Market will open — a crucial event for Free-to-Play (F2P) players. Here, you can use in-game resources to purchase:
- shards to activate Exclusive Weapons (Murphy, Carlie, Swift);
- other rare seasonal materials.
5. Promoting Violet to UR
Starting from the third week of the season, an event will appear where you can promote the hero Violet (SSR) to UR status.
We advise you not to rush and wait for the right moment to:
- get maximum points in the "VS Duel" event;
- invest your resources as efficiently as possible.
A detailed guide on hero promotion is available in our Season 2 Events Guide.
6. Hero Level Swap
The event will start on the first day of the second week of the season and will last for 42 days. Key features:
- You can select two heroes and swap their experience levels.
- Some skills may be temporarily locked if the hero's level drops below the requirement after the swap.
- This is a great opportunity to fix early leveling mistakes or instantly boost the heroes you need for current tasks.
This process and its nuances are covered in more detail in our Season 2 Events Guide.
Professions in Season 2
In Season 1, we were introduced to the Hall of Professions and chose our specialization: Engineer or Military Leader. After the season ended, we all continued to use our Core Skills, but progression was strictly capped at level 40.
With the start of Season 2, the maximum profession level is increased to 70! This unlocks further progression in the talent tree. As always, you can find full information about all Core Skills in our detailed profession guide. Here, we will focus on the features of the Seasonal Skills in Season 2.
Features of Seasonal Skills
Seasonal Skills reappear in the talent tree. Just like in the previous season, they are identical for both the Engineer and the Military Leader. These skills are focused on:
- gaining Profession EXP (since it was impossible to accumulate experience during the off-season, active leveling resumes only now);
- making seasonal quests easier to complete and adapting to the new polar mechanics (resource gathering, temperature management).
Seasonal Skills should be maxed out, as surviving and completing season goals becomes significantly harder without them. You cannot skip a skill in the tree — you will have to learn them sequentially.
Important: After Season 2 ends, the points spent on Seasonal Skills will be reset again, and you will be able to freely redistribute them into permanent Core Skills.
Profession Levels and Skills in Season 2
As you progress toward level 70, new talents will unlock. A total of 10 Seasonal Skills will be available in Season 2, each of which is crucial for your progression on the snow-covered map.
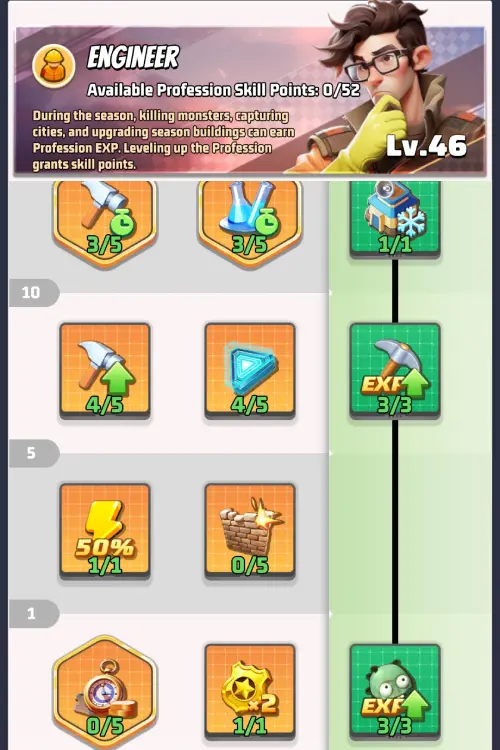
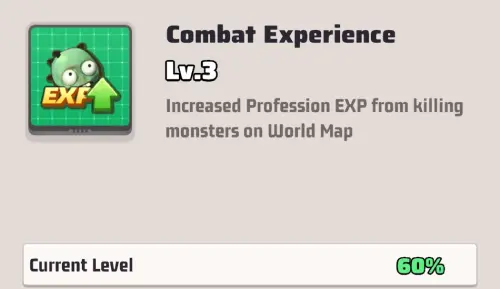
Level 1 — Combat Experience — (Passive)
This skill increases the amount of Profession EXP gained from killing monsters on the World Map.
- Maximum skill level: 3.
- Effect (at level 3): Increases EXP gained by 60%.
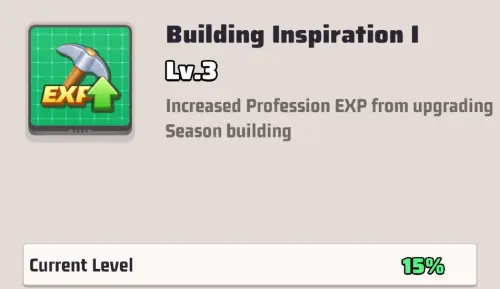
Level 10 — Building Inspiration I — (Passive)
This skill increases the amount of Profession EXP gained from upgrading any season buildings.
- Maximum skill level: 3.
- Effect (at level 3): Increases EXP gained by 15%.
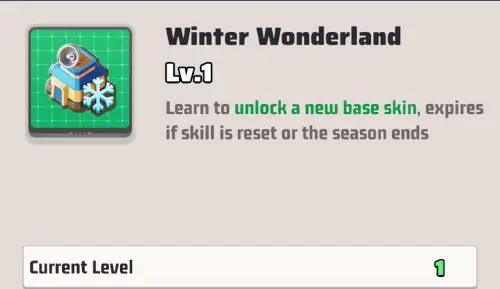
Level 15 — Winter Wonderland — (Passive)
This skill unlocks a new seasonal base skin.
- Maximum skill level: 1.
- Important: The effect (skin) expires if you reset your skill points or when the current season ends.
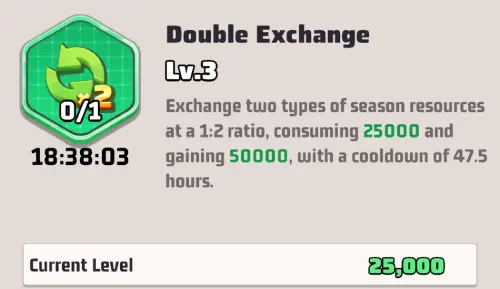
Level 25 — Double Exchange — (Active)
This skill allows you to exchange two types of season resources at a favorable 1:2 ratio.
- Maximum skill level: 3.
- Effect (at level 3): You consume 25,000 units of one resource and gain 50,000 units of another resource.
- Cooldown: 47.5 hours.
💡 Tactical Tip: This skill is incredibly useful at the very start of the season. If your profession reached level 40 by the end of Season 1 (which easily covers the level 25 requirement), you can use this exchange on day one! It's the perfect chance to instantly exchange Coal for the scarce Titanium Alloy to quickly build and upgrade new buildings.
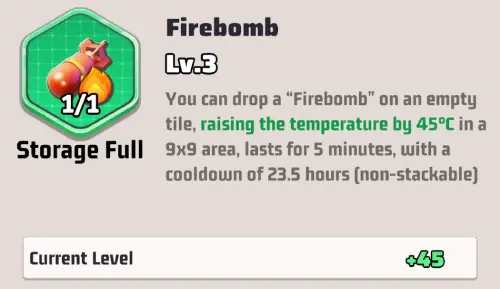
Level 30 — Firebomb — (Active)
This skill allows you to drop a "Firebomb" on an empty tile on the World Map, creating a powerful temporary heat zone.
- Maximum skill level: 3.
- Effect (at level 3): Raises the temperature by 45°C in a 9x9 area. Effect duration — 5 minutes (effects from multiple bombs do not stack).
- Cooldown: 23.5 hours.
💡 Tactical Tip: While this skill can be used to emergency-heat freezing allies' bases, it is much more profitable and effective to use it to melt ice and search for abandoned supplies on the map.
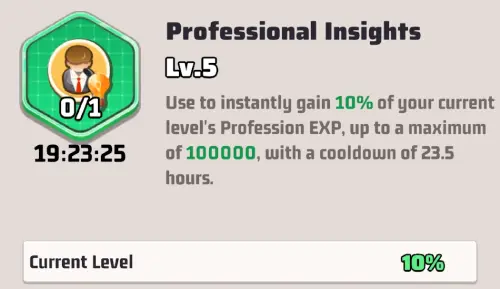
Level 35 — Professional Insights — (Active)
This skill allows you to instantly gain a solid chunk of EXP to quickly level up your profession.
- Maximum skill level: 5.
- Effect (at level 5): You instantly gain 10% of your current level's Profession EXP (up to a maximum of 100,000 EXP at a time).
- Cooldown: 23.5 hours.
💡 Tactical Tip: Be sure to use this skill every day as soon as it's ready (the cooldown is intentionally set just under 24 hours).
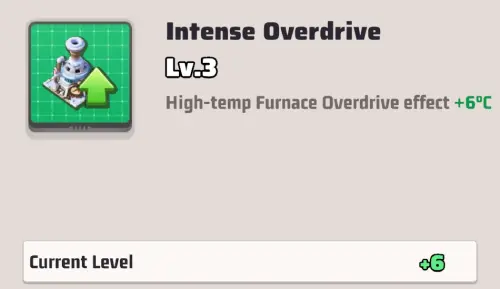
Level 40 — Intense Overdrive — (Passive)
This skill enhances the effectiveness of your High-Heat Furnace's Overdrive mode.
- Maximum skill level: 3.
- Effect (at level 3): Additionally raises the furnace temperature in Overdrive mode by +6°C.
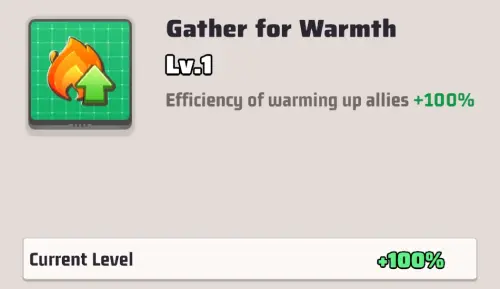
Level 45 — Gather for Warmth — (Passive)
This skill significantly increases the efficiency of your assistance when warming up allies' bases.
- Maximum skill level: 1.
- Effect (at level 1): Increases the efficiency of warming up allies by +100%.
💡 Tactical Tip: Basic assistance with a recon plane raises an ally's temperature by 2 degrees. Thanks to this skill, you will provide +4 degrees at once.
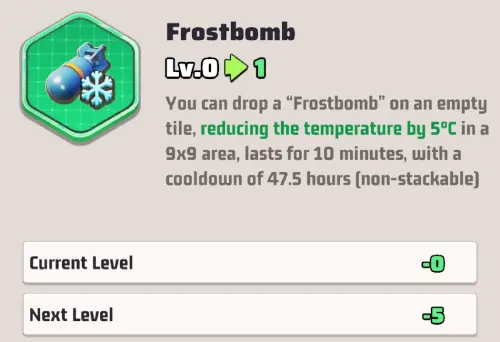
Level 55 — Frostbomb — (Active)
This skill allows you to drop a "Frostbomb" on an empty tile on the World Map, creating a zone of extreme cold to weaken enemies.
- Maximum skill level: 3.
- Effect (at level 1): Lowers the temperature by 5°C in a 9x9 area. Effect duration — 10 minutes (effects from multiple bombs do not stack).
- Cooldown: 47.5 hours.
💡 Tactical Tip: This skill is designed exclusively for active PvP actions.
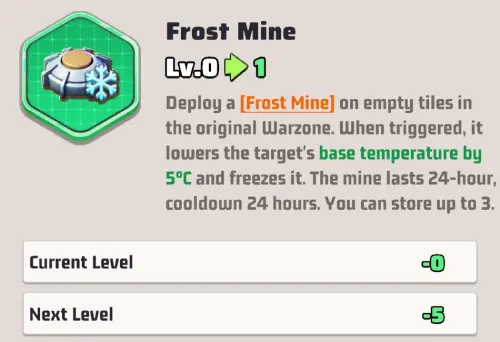
Level 60 — Frost Mine — (Active)
An even more specific late-game skill. It allows you to secretly deploy traps on empty tiles within your original Warzone.
- Maximum skill level: 3.
- Effect (at level 1): When triggered, the mine lowers the enemy base's temperature by 5°C and freezes it.
- Duration and Charges: A deployed mine lasts on the map for 24 hours. You can store up to 3 mine charges simultaneously.
- Cooldown: 24 hours per charge.
Helpful or not? Comment
Discuss
HQ Chat
Enjoyed the guide? Rate it or share your thoughts below. Here we discuss tactics, heroes, and game events.