

Last War Season 2 Events Guide: Polar World Mechanics
📌 Table of Contents
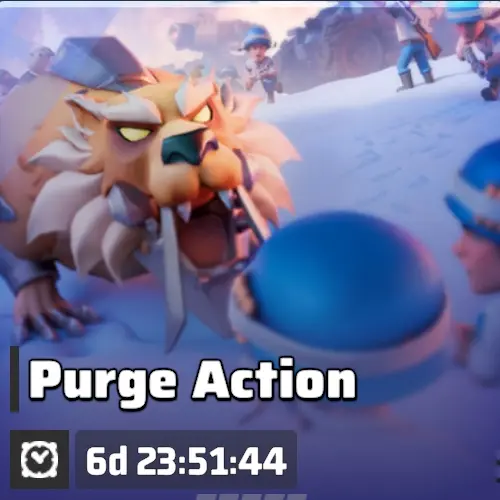
Purge Action
Event Duration: The event starts on the first day of the first week of the season and lasts exactly 7 days.
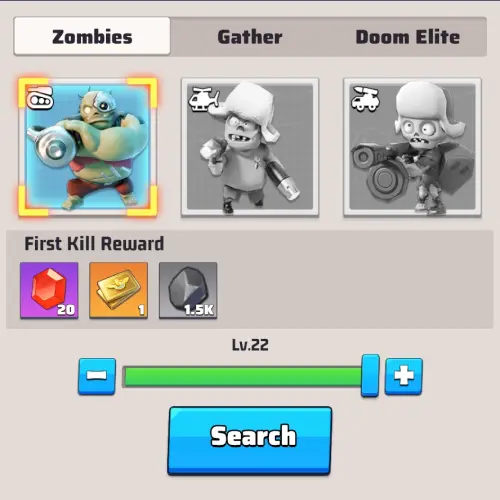
The core of the event is a solo hunt for seasonal zombies. Instead of standard enemies, three new types of infected spawn on the map. This allows you to use the unit counter system to maximize your damage:
- Aircraft counter Tanks;
- Missile Vehicles counter Aircraft;
- Tanks counter Missile Vehicles.
In practice, most players have their main march heavily invested in a single unit type. As long as your Virus Resistance meets the enemy's level, these zombies won't pose a serious threat. All attacks in this event are strictly solo.
For the first kill of an enemy at each level, you receive Coal . The reward is given for each unit type: by killing one zombie of all three types at a new level, you'll get 1.5K Coal for each (totaling 4.5K Coal for fully clearing the level).
Event Mechanics
- After the event starts, the time when a player first kills a zombie of the highest available level is recorded.
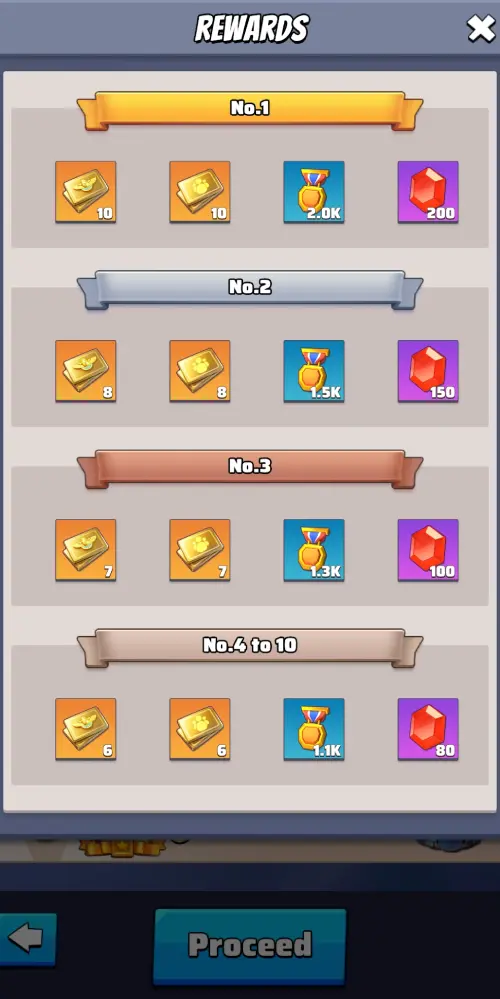
- Rankings are determined by the level of the killed zombie: the higher the level, the higher your position. In case of a tie, the player who cleared it first gets the advantage.
- Ranking rewards are sent daily via in-game mail.
Important: If you are a free-to-play (F2P) player, expecting high positions in the rankings will be tough. Spenders upgrade their Virus Resistance much faster, allowing them to clear higher-level zombies within these 7 days. Ranking rewards are delivered daily to your mailbox.
Digging Stronghold Clash
Event Duration: Starts on the first day of the first week of the season, lasts for 13 days, and is identical to the similar event in Season 1.
Event Overview: The main focus now shifts from solo hunting to capturing Dig Sites together with your Alliance.
- After the event starts, the time it takes for your Alliance to capture a Dig Site is recorded.
- Rankings are based on the level of the Dig Sites: the higher the level of the captured site, the higher the Alliance's rank.
- In case of a tie in Dig Site levels, the Alliance that completed the capture faster (earlier in time) wins.
Data is updated daily, and rewards are sent to participants via in-game mail.
Important: The rewards for this event are quite modest. High ranking positions are usually taken only by top Alliances with high activity and a strong roster. Key Point: Capturing Dig Sites is a necessary step to advance towards the cities. We explained this mechanic in detail in a separate article about the Season 2 Map.
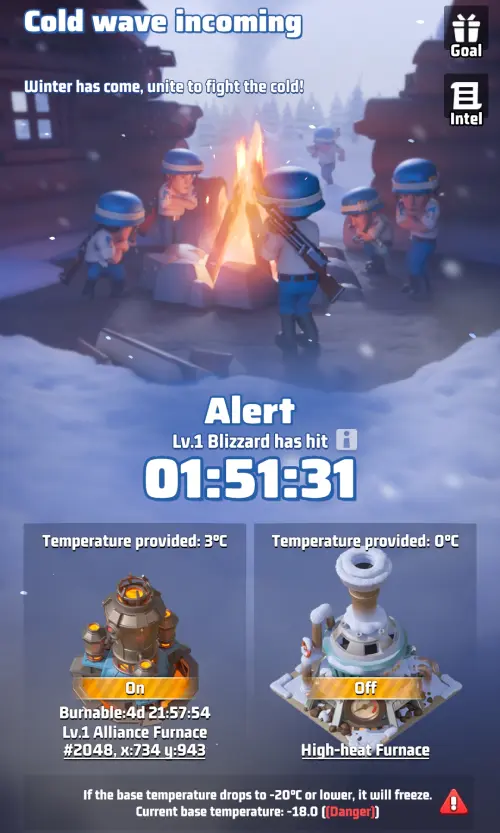
Cold Wave Incoming
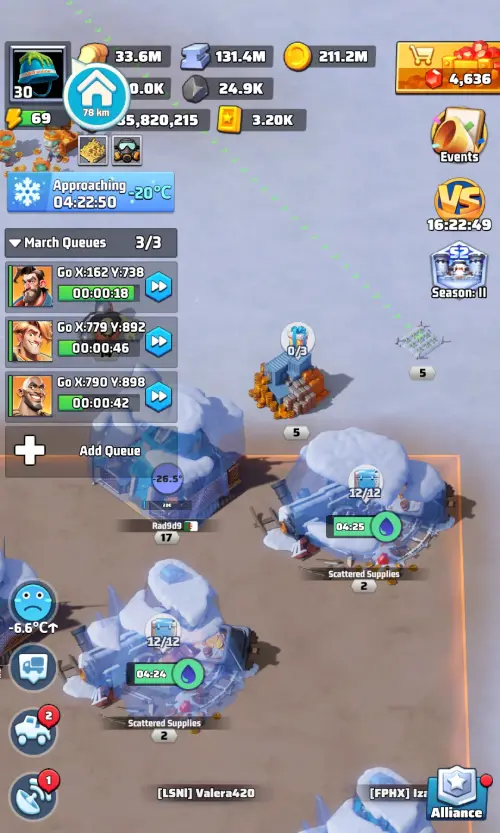
The "Cold Wave Incoming" event is a recurring survival challenge. Snowstorms regularly hit the server, drastically dropping the ambient temperature. Your main goal is to prevent your city from freezing below the critical -20°C mark and claim your survival rewards.
Event Interface and Tasks
In the main event menu, you can always track the timer for the next blizzard and its level. There is also a list of simple tasks that reward you with extra Coal (4K for each task):
- Make season donations or Alliance donations;
- Help your allies increase temperature;
- Keep the High-heat Furnace running;
- Keep the High-heat Furnace overdriving.
Blizzard Mechanics
During a storm, even polar zombies freeze, bringing almost all World Map activity to a halt. The freezing intensity directly depends on the level of the incoming blizzard:
- Level 1: drops the temperature by -10°C;
- Level 2: drops the temperature by -15°C;
- Level 3: drops the temperature by -20°C.
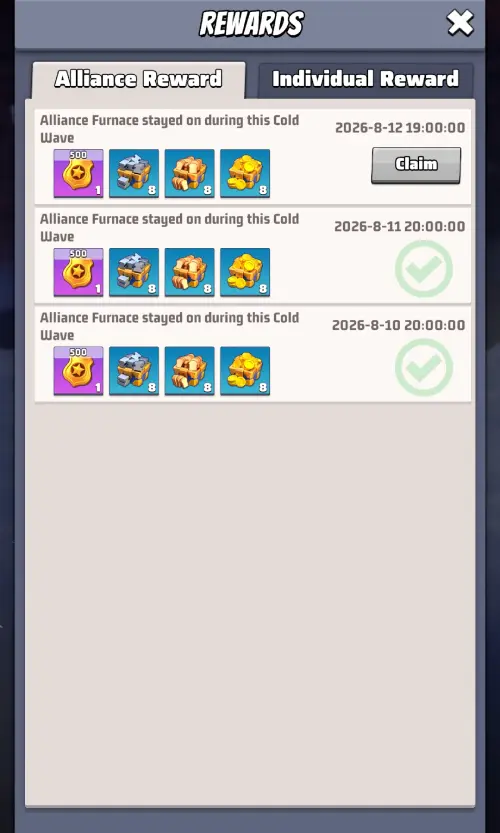
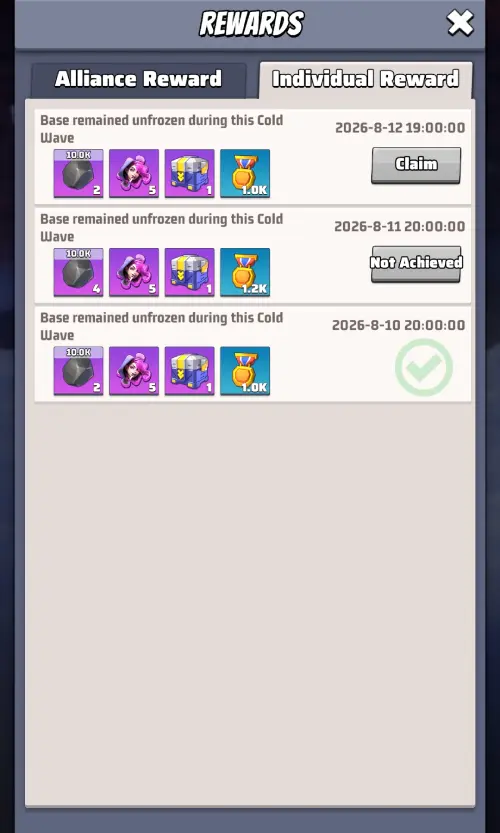
The event offers small but nice rewards. You will receive resources, Universal Shards, and Alliance Badges if you meet two conditions: your personal base remains unfrozen, and the Alliance leadership manages to keep the Alliance Furnace running throughout the entire storm.
How to Survive the Cold
To avoid turning into an ice block and getting your in-game actions locked, you need to manage your temperature wisely. Here are the basic strategies:
- Furnace Auto-start: The easiest option for your personal base is to set the High-Heat Furnace to auto-start when a blizzard approaches. But keep in mind that this process actively burns your Coal.
- Survival Math: Always check your current temperature. For example, if your territory is currently at -6°C and a Level 1 blizzard (-10°C) is incoming, the final temperature will be -16°C. This is above the critical -20°C mark, meaning you don't need to heat the base and can save your resources.
- Alliance Furnace: If you are within the range of the allied furnace, your survival depends on the officers. Coordinate the heating activation in advance to protect the entire hive.
Supply Collection
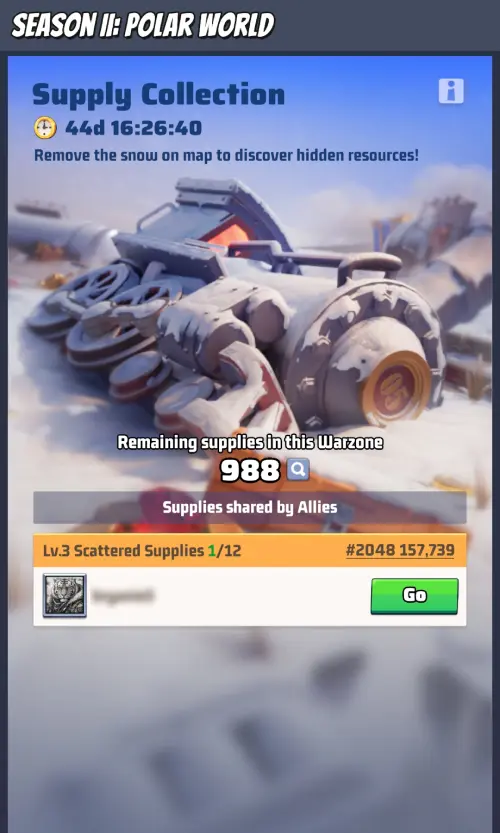
In the "Supply Collection" event, you will search for hidden resources on the snow-covered map. This event only allows you to gather extra resources and doesn't really impact the global season progression. Rather, it's a nice additional bonus that quick-witted players can take advantage of.
The main difficulty is that the loot is frozen in the ice. To claim the reward, you need to raise the land temperature at the drop point above 0°C.
Basic Event Rules:
- Limit: You can collect supplies a maximum of 5 times a day.
- Collection Mechanics: Supplies are gathered using a Scout Plane. You deploy it from your base, and the flight time to the drop point directly depends on the distance.
- Restriction: Each player can claim a reward from a specific point only once.
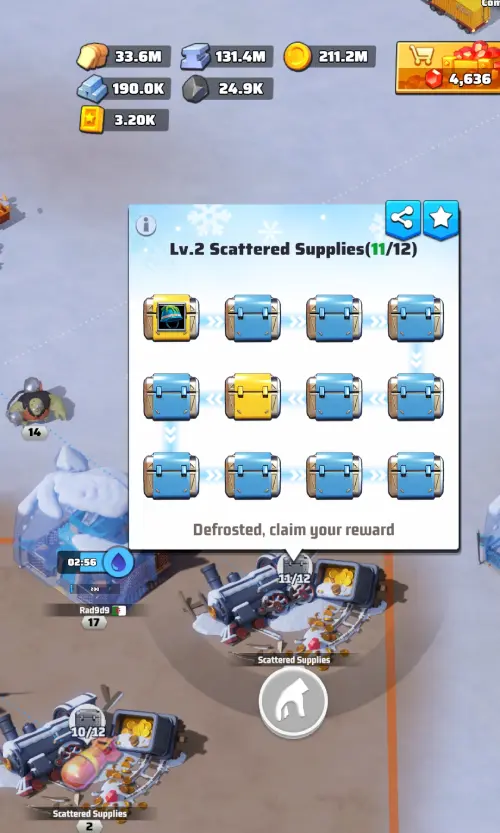
- Queue: There are exactly 12 boxes at one drop point. They are distributed to players in a strict snake-like order (left to right in the first row, then right to left in the second, and so on).
Sniper Tactics: Hunting for Golden Chests
In the chain of 12 boxes, there are special ones — golden chests with upgraded loot. The first box is always golden, and it goes to the player who found and defrosted the point. Besides the first one, other golden chests can randomly appear in the chain.
Since you can only take one prize per point, you can compete for these random golden chests at other people's (already defrosted) supplies using a little trick. The shared queue moves through the efforts of all players on the server, so you can snipe the best reward:
- Teleport Tactic: If you have spare teleports, move your base right next to the found supplies. Watch the distribution closely: wait until other players grab the regular blue boxes. As soon as the queue reaches the golden one, deploy your plane. Because of the minimal distance, it will arrive instantly, and the loot is yours.
- Timing Tactic (No Teleport): Calculate the exact flight time of your Scout Plane from your base to the point and deploy it in advance. Your goal is to time it perfectly so that the plane arrives exactly when the golden box becomes available.
How to Find and Defrost Supplies
Waiting for your Alliance to capture a nearby city or build an Alliance Furnace to heat the land takes too long. There is a more aggressive strategy for fast farming.
Use the active Profession skill "Firebomb". Activating this skill instantly raises the temperature by 45°C in a 9x9 grid. The skill has a 24-hour cooldown, so use it wisely.
The Ideal Daily Hunt Algorithm:
- Don't waste time flying blindly around the map. Open the special interactive map cpt-hedge.com, which contains the exact X and Y coordinates of all supplies.
- Pick a convenient point, enter the coordinates in the game, and find the frozen loot.
- Drop a "Firebomb" to instantly melt the ice and heat the land.
- Deploy your plane immediately and claim the first guaranteed golden chest.
Beast Crisis
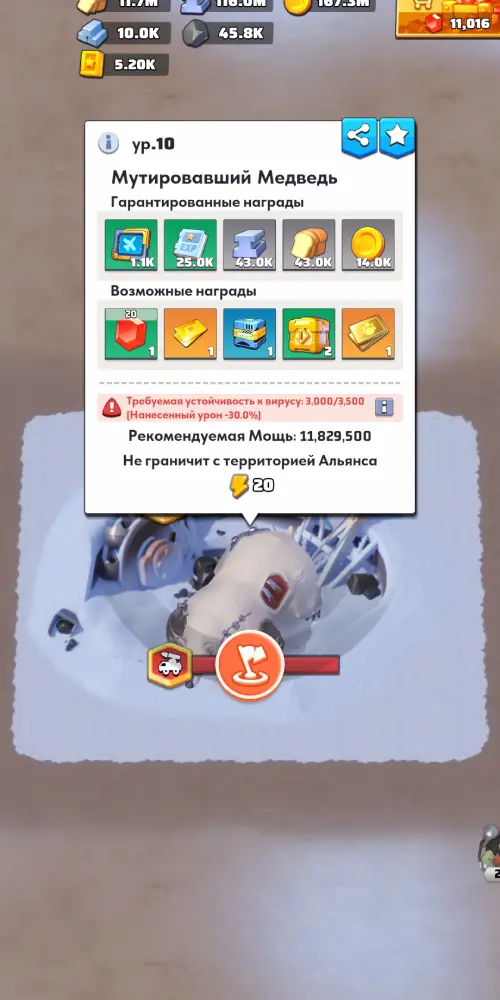
The "Beast Crisis" event starts on Monday of the second week of the season and lasts for 19 days. The event is a complete equivalent of the "Crimson Legion" from Season 1, but with one key difference: enemy waves now attack your Alliance Furnace instead of cities.
In fact, active combat takes place twice a week — every Tuesday and Friday.
How the Event Works
Before each attack, the server sends out a warning so the Alliance has time to prepare their defense. The defense mechanics remain familiar:
- Members send their troops as reinforcements to the Alliance Furnace (garrison capacity is limited).
- The attack consists of 30 consecutive waves of Mutant beasts.
- The more waves your garrison survives, the richer the final loot will be.
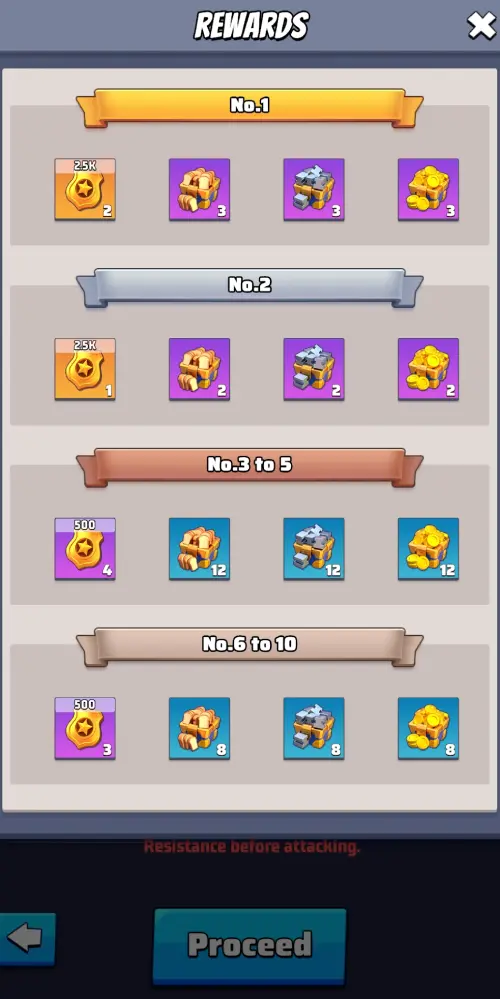
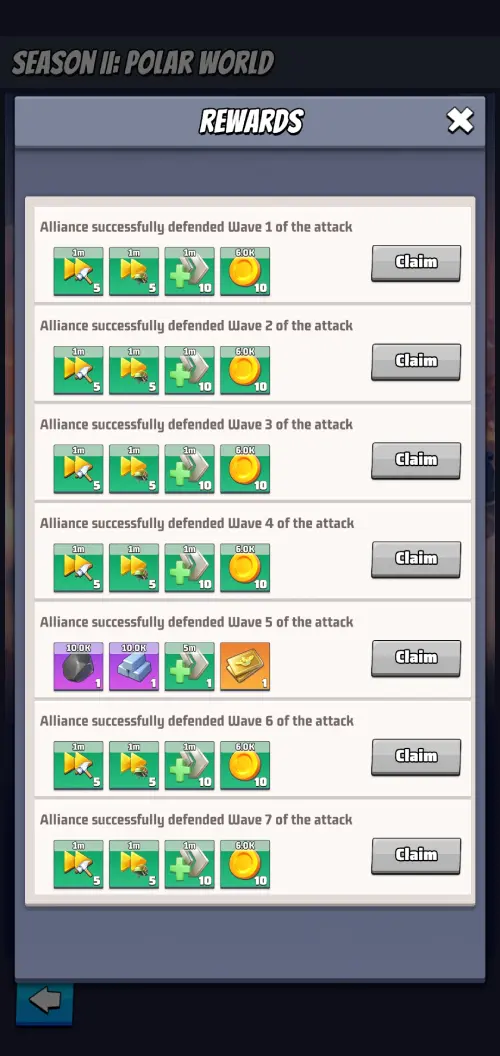
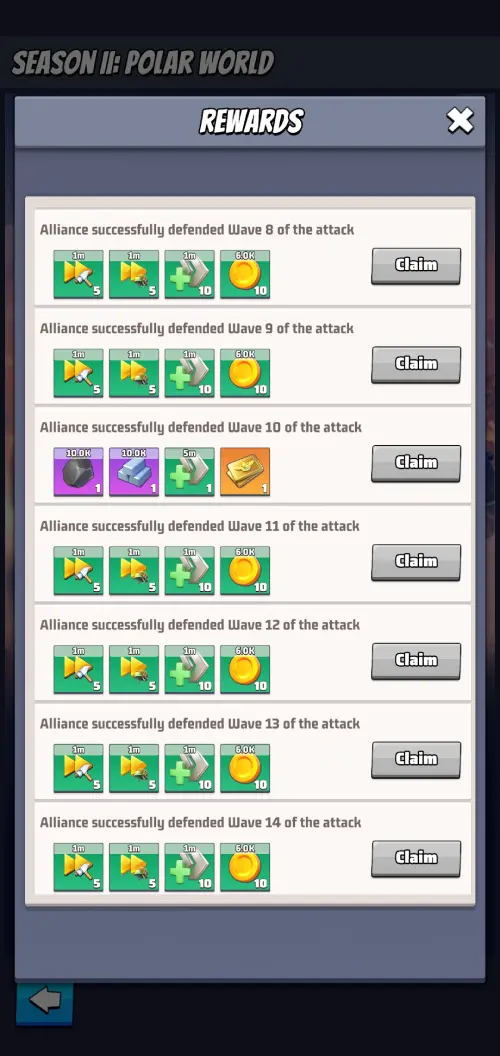
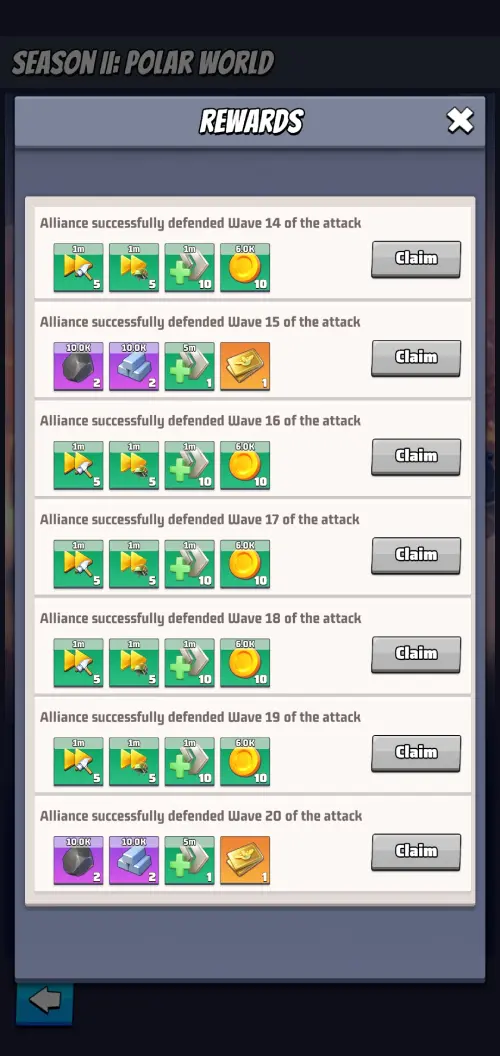
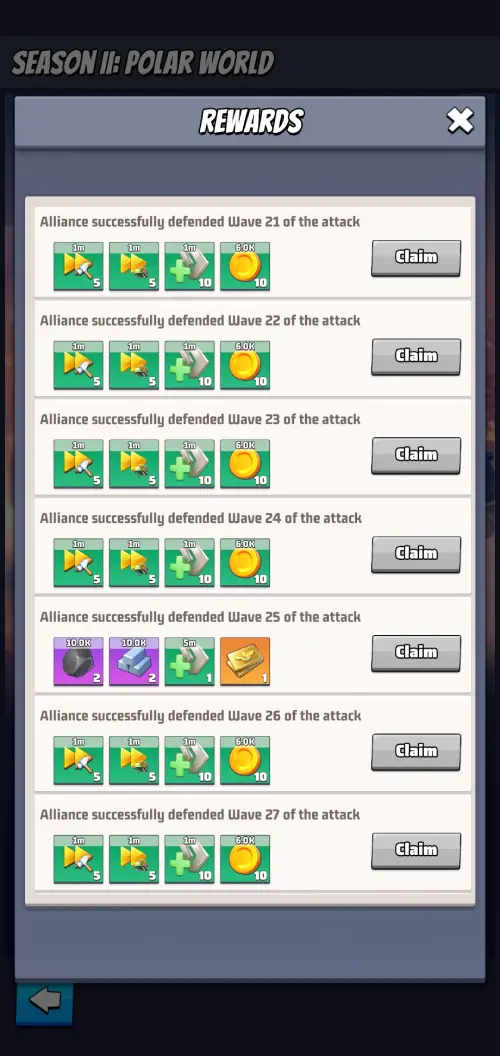
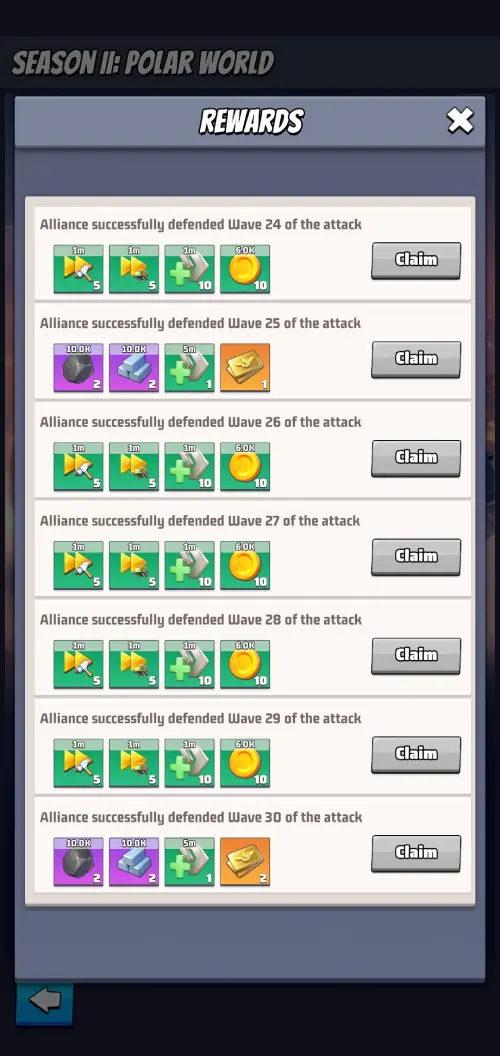
All Alliance members receive rewards for a successful defense, even if they didn't send troops personally. The prize pool includes universal speedups, resources, Coins, and valuable Coal.
Risks and Defense Tactics
In the early stages, repelling the attack is easy — just drop your reinforcements, after which you can even go offline. But with each new wave, the beasts grow stronger and start dealing significant damage to the defenders.
To successfully clear the later waves, rotation is required: active players must recall their wounded troops, heal them in the Hospital, and replace fallen fighters with fresh forces.

What happens if you fail:
- If the garrison fails to clear a wave, the Alliance Furnace takes damage, and the reward for that stage is lost (but if you repel the subsequent attacks, you will still get the loot for them).
- If the Furnace's Durability drops to zero, it will be destroyed. In this case, the Alliance loses the ability to receive rewards for all subsequent mutant raids.
- If the Alliance has no Furnace at all (or it is already destroyed) at the time of the attack warning, the defense automatically fails.
Wave Rewards:
Polar Dishes
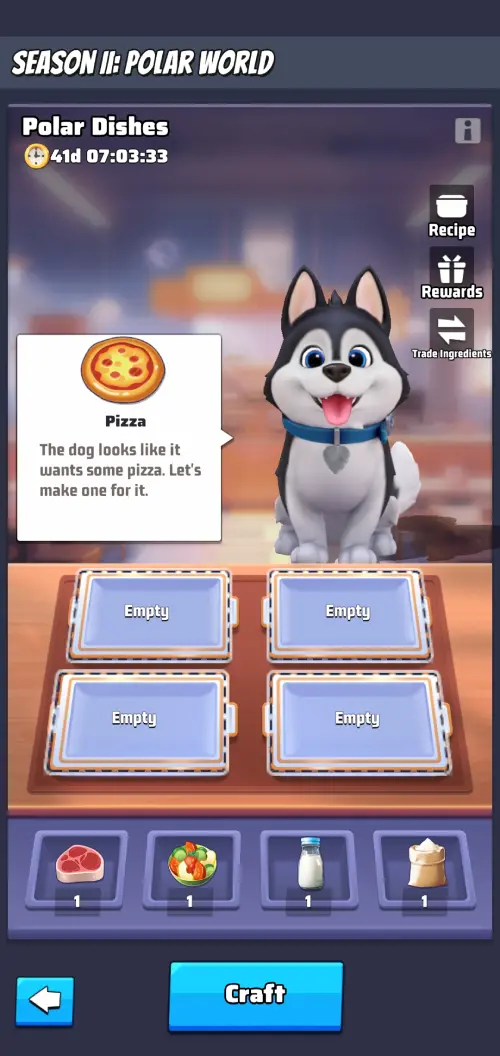
In this event, you will take on the role of a chef and feed a dog named Snowflake. This is a great source of resources and Universal Exclusive Weapon Shards. The main rule of the event is not to rush and to cook strictly according to the recipe, otherwise, you will lose the most valuable part of the reward.
Collecting Ingredients and Recipes
In the second season, culinary ingredients are added to the regular daily task rewards. They are tied to the progress bar, which consists of five stages (chests):
 Stage 1: Meat
 Stage 2: Fruits/Vegetables
 Stage 3: Dairy
 Stage 4: Flour
 Stage 5: Ingredient Choice Box
This final chest adds variety and saves you when you are short on a specific product. Try to complete the entire progress bar daily (which is quite easy), otherwise, you risk hoarding Meat from the early stages and running out of Flour.
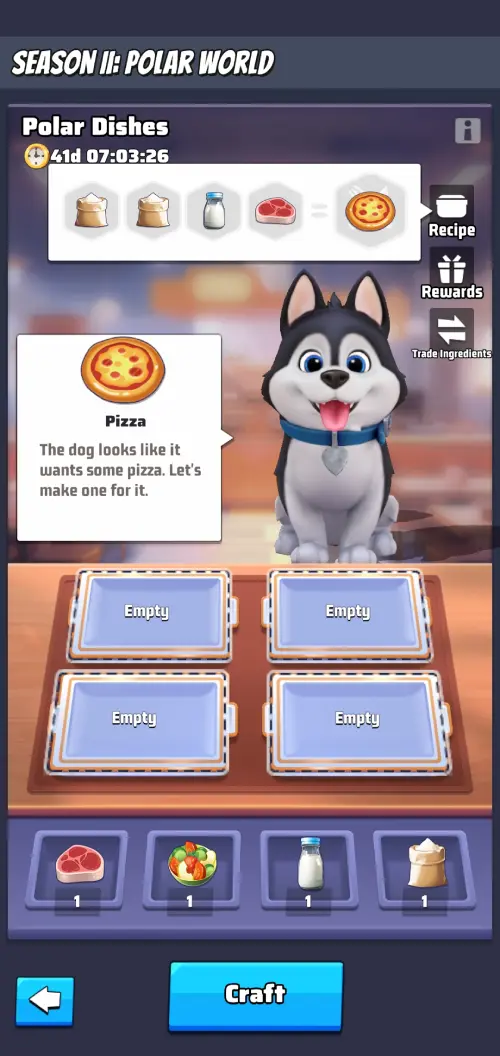
Snowflake's taste preferences are constantly changing. Before putting ingredients on the stove, make sure to check the "Recipe" menu. It shows exactly what dish (e.g., pizza) the dog wants right now and which 4 ingredients are needed for it. Keep in mind that recipes vary: some will require one of each ingredient type, while others might need three bags of Flour and one Meat.
Rewards: Why You Shouldn't Cook at Random
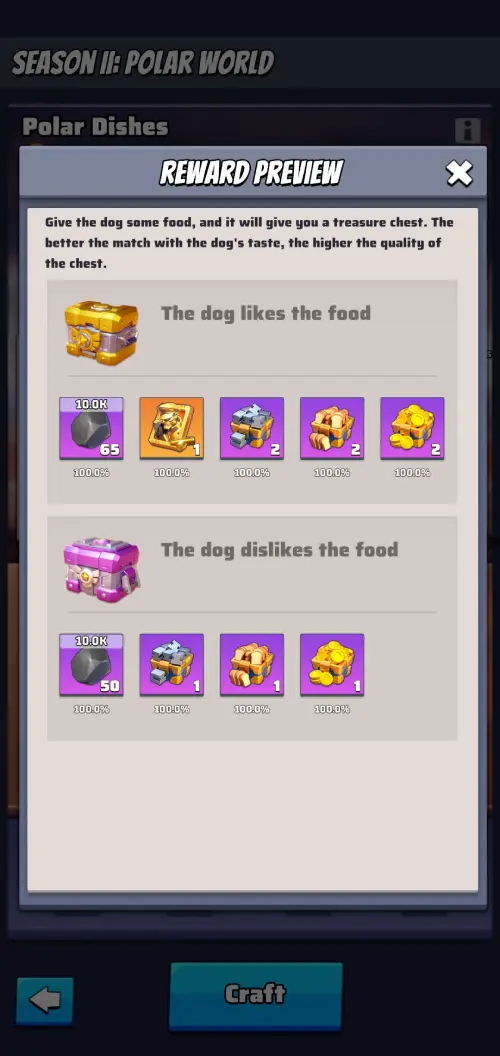
Every dish you cook yields a loot chest, but its quality directly depends on your accuracy:
- The dog likes the food (strictly by the recipe): You receive a Golden chest. Inside, you'll find plenty of Coal (the seasonal resource), other resources, and most importantly, a Universal Exclusive Weapon Shard.
- The dog dislikes the food (wrong recipe): You receive a Purple chest. You'll get less Coal, and you won't get a Universal Exclusive Weapon Shard at all.
Tactics: Exchange, Hoarding, and Boosts
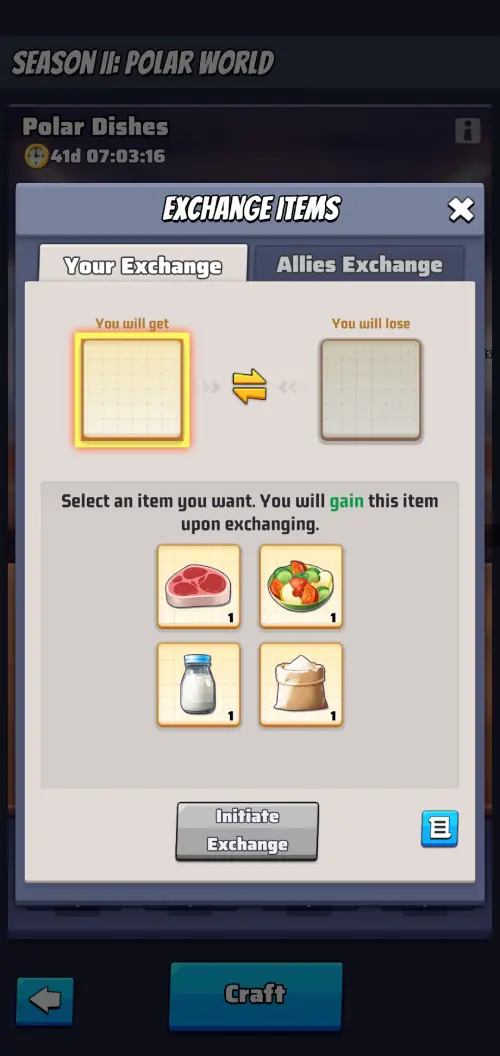
If you are missing a specific ingredient for the perfect dish, under no circumstances should you throw random items into the slots. You have three correct options:
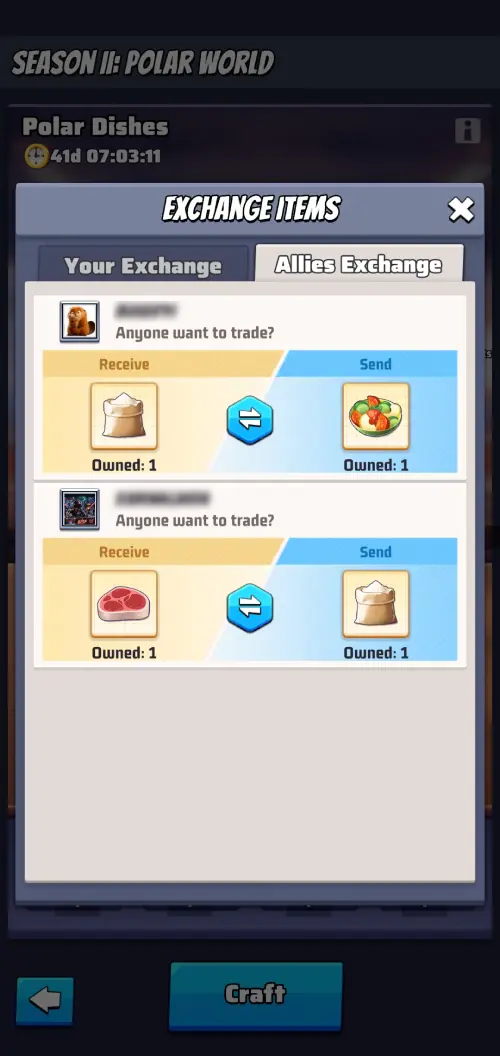
- Alliance Exchange: There is a special tab in the event menu. You can create a request and trade your extra Dairy to an ally in exchange for the Meat you need.
- Waiting Game: There is no daily cooking limit in this event. If there's no one to trade with, just don't cook anything! Keep collecting ingredients from dailies for the next few days. Once you have the right set, start cooking.
- "One More" Profession Skill: This skill unlocks at Profession level 55. Many players ignore it because the base daily rewards are weak. But if you max it out (requires 5 profession skill points), you get a 25% chance to receive one more daily reward. In the season, this means a chance to double your ingredients! Out of five boxes a day, one is bound to double, which over time will give you a significant amount of extra dishes.
Right after a successful feeding, Snowflake will ask for a new dish. Thanks to the lack of limits, you can hoard a mountain of ingredients over a week, and then cook 5-10 correct dishes in a row in a single day, collecting every single Exclusive Weapon Shard.
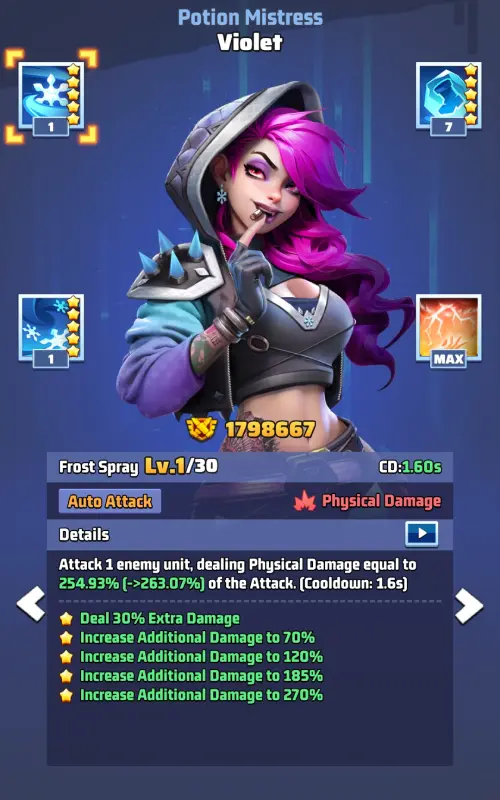
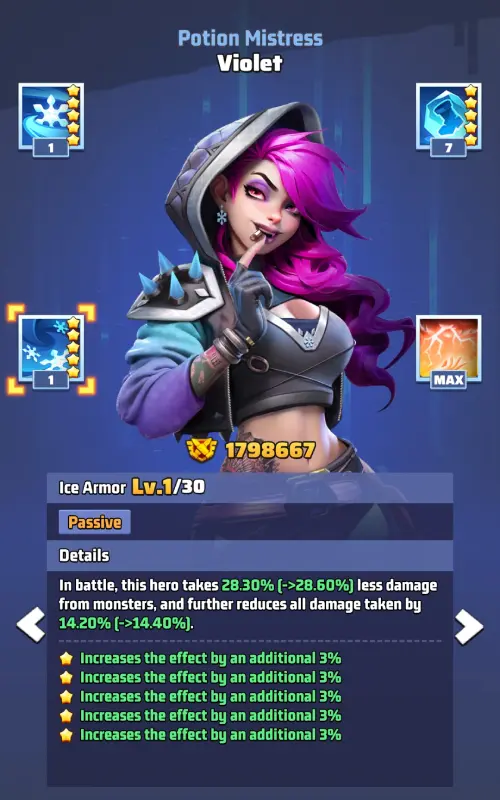
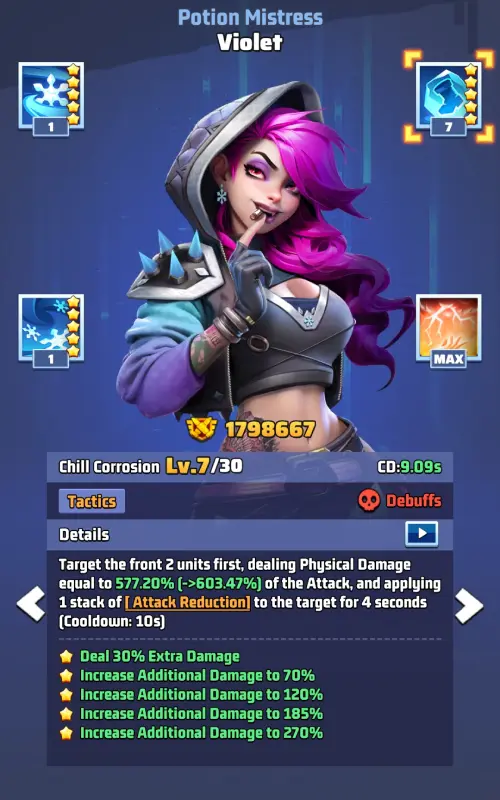
Promoting Violet to UR
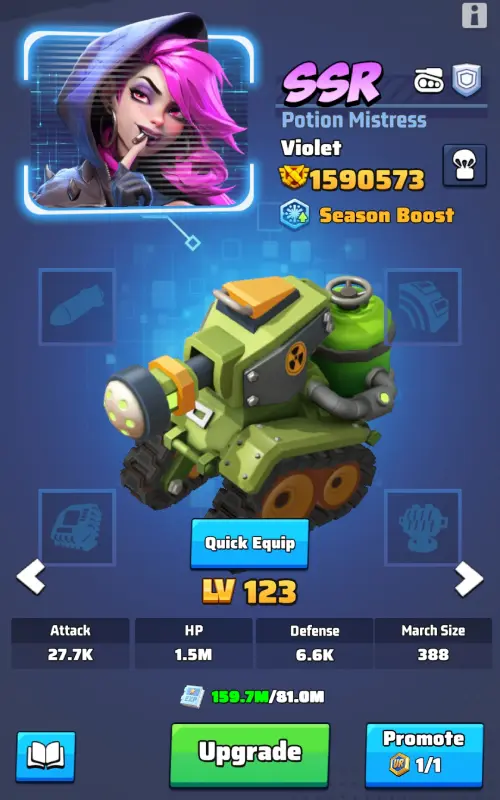
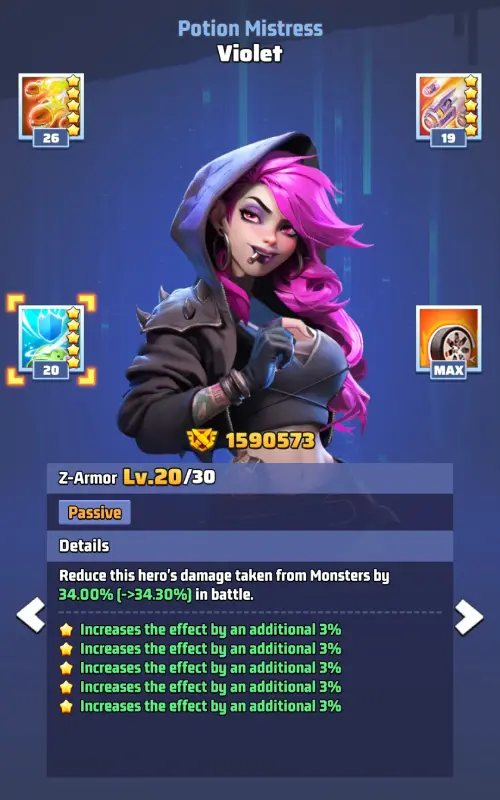
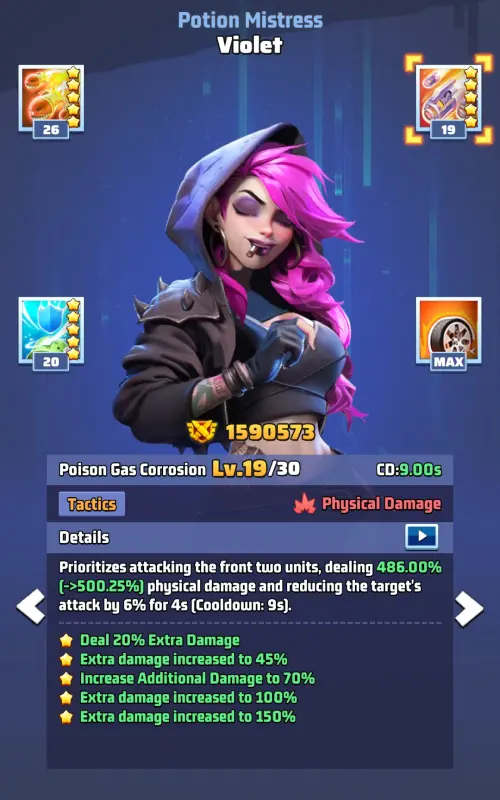
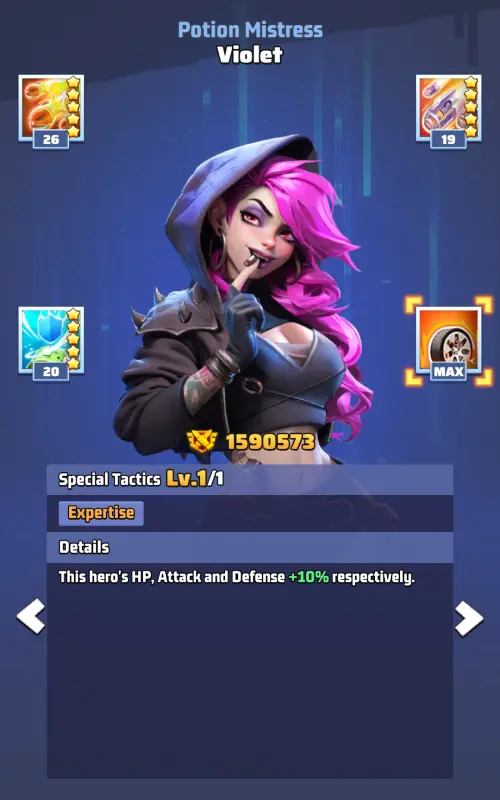
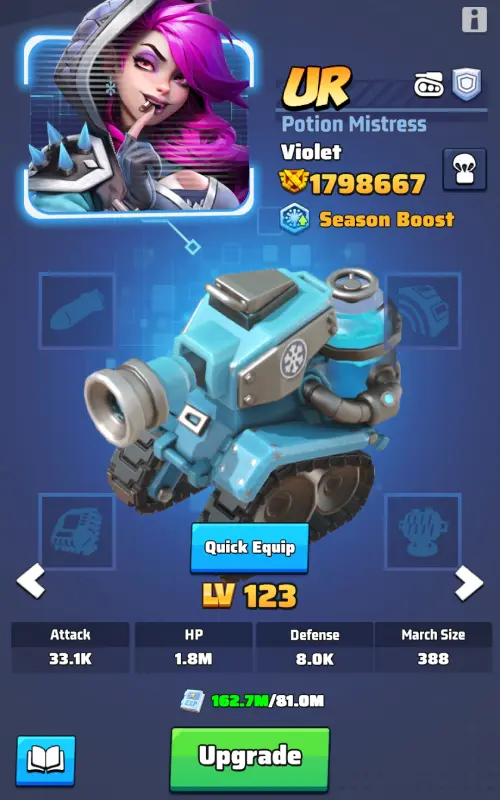
You can promote Violet to UR tier starting from the first day of the third week of the season until its end. The mechanics of this event are completely identical to promoting Mason in Season 1. Therefore, we will remind you of the process itself and point out the key changes.
Promotion Requirements
- Violet must be at the 5-star tier.
- You need to obtain the Legendary Hero Badge
 . While in Season 1 it was given almost automatically, now the badge is a reward for reaching Level 30 of the High-Heat Furnace. Players with low playtime will find it difficult to meet this condition exactly by the start of the third week, so you'll have to put in some effort.

What Happens After Promotion
- Violet's star level will be reset to 3 stars.
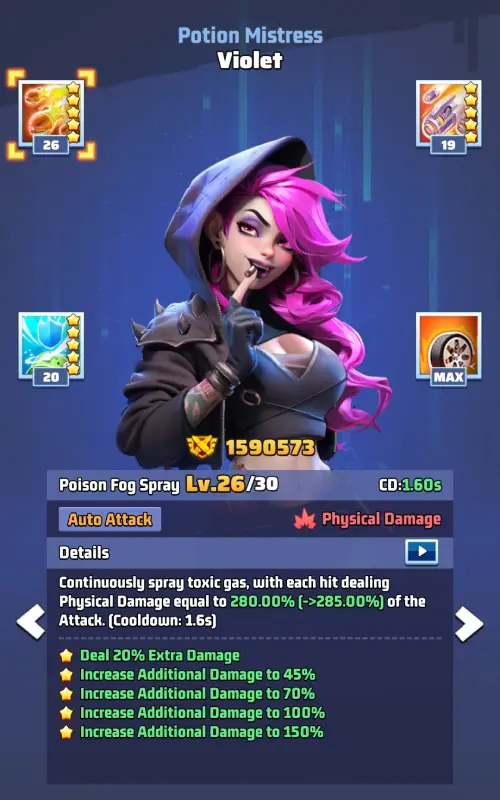
- All skills will be reset to level 1 and slightly changed.
- The hero's level will remain unchanged.
- All Wall of Honor buffs gained after reaching 5 stars will be lost.
What Will Be Returned
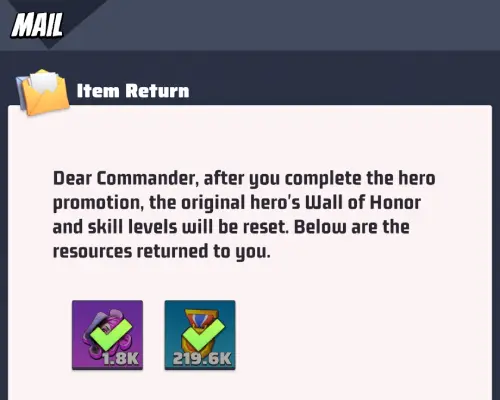
- Shards spent on upgrading the Wall of Honor will be returned at a rate of 10 per level in the form of specific Violet Shards
 (not universal ones, even if you used them).
 - Skill Medals
 spent on upgrading skills will be fully refunded.
 - Shards used to upgrade from 3 to 5 stars are not refunded.
- All refunded items will be sent to your in-game mail.
How to Upgrade Violet After Promotion
- You will need Violet Shards and Universal SSR Shards
 .
. - It will now require twice as many resources compared to a regular SSR hero upgrade.
- To get Violet back to 5 stars, you will need 1,600 shards.

Using the Promotion on Hero Day (Thursday)
On Thursday, the Hero Day event takes place, where points are awarded for using Hero Shards and Skill Medals. This is a great chance to maximize your points in Duel VS.
Recommended sequence of actions:
- Spend all your Violet Shards and Universal SSR Shards on upgrading the Wall of Honor (10 shards per level).
- Use all your Skill Medals to upgrade Violet's skills.
- Apply the Legendary Hero Badge — Violet will be promoted to UR, and the resources (medals and Wall of Honor shards) will be refunded.
- Use the refunded shards to upgrade Violet's tier from 3 to 4, and then to 5 stars (if you have enough resources).
- Skill Medals can be reinvested back into Violet or redirected to a more important hero if she isn't in your main squad.
This approach allows you to double-dip the same resources during a single event and get the maximum amount of points in Duel VS.
Final Conclusions
- ❌ You will lose the shards invested in the tier upgrade from 3 to 5 stars.
- ❌ You will lose the Wall of Honor buffs.
- ⚠️ Upgrading Violet to 5★ will become twice as expensive.
- ✅ UR Violet will become slightly stronger.
- 📉 Weaker than native UR heroes. Even with the promotion, Violet falls completely short of the level of full-fledged golden heroes. While promoting Mason made sense in Season 1 (since not everyone had a maxed Stetmann), Violet is unlikely to become the core of your main squad.
- ⏳ Main tactical advice: Most players will spend their badge and resources on Thursday of the third week. Since Violet is likely not your key hero, postpone her promotion until Thursday of the fourth week (or until the moment when your Alliance critically needs points in the duel). You will incredibly surprise both enemies and allies with a sudden and massive point burst!
Hero Level Swap
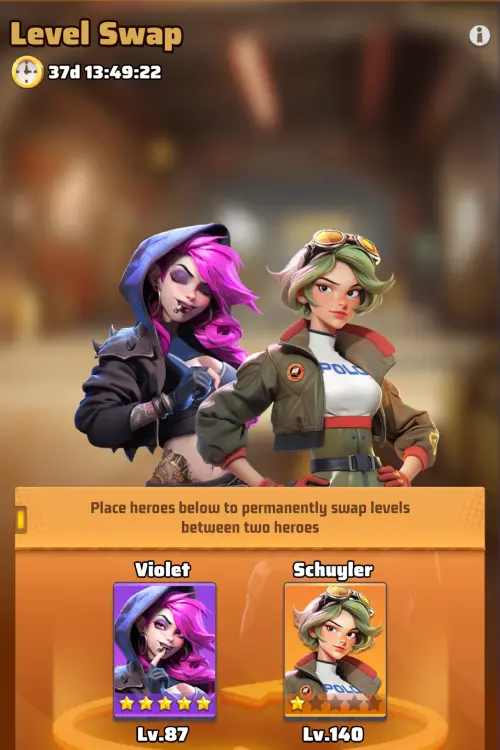
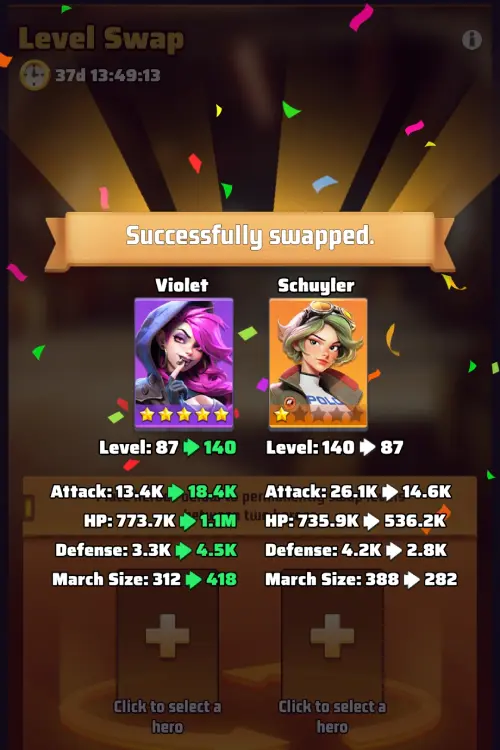
This event starts on the first day of the second week and lasts until the very end of the season. The mechanics are completely identical to Season 1: using special Swap Coupons , you can swap the levels of any two heroes.
It is worth noting that at the Season 2 stage, this event largely loses its relevance. Most active players already have all their main squads and useful heroes maxed out. However, if you just got a new hero or made a mistake with experience distribution in the past, this is a great chance to quickly boost a newcomer without a long grind.
Important to consider when swapping:
- If the downgraded hero had unlocked skills that depend on their level, they will be temporarily locked.
- To unlock these skills again, you will need to level up the hero the standard way.
Helpful or not? Comment
Discuss
HQ Chat
Enjoyed the guide? Rate it or share your thoughts below. Here we discuss tactics, heroes, and game events.